第一章:IO 流体系(⭐)
1.1 概述
- 之前,我们已经学习过了 IO 流体系,如下所示:
提醒
- ① 在实际开发中,我们经常使用最下面的四个流,即:
FileInputStream、FileOutputStream、FileReader以及FileWriter。 - ② 上述的四个流是 IO 流体系中最基本、最常用的流,我们也称为基本流。
1.2 高级流
- 高级流就是对基本流进行了一层封装,额外增加了一些新的功能,如:基本流操作效率太慢,给它们增加缓冲区。
字节流的基本流是没有缓冲区的,而字节流的缓冲流提供了缓冲区,所以效率提升的很明显。字符流的基本流本来就有缓冲区,所以字符流的缓冲流的效率提升的并不是很明显;但是,字符流的缓冲流提供了几个好用的方法。
第二章:缓冲流(⭐)
2.1 概述
- 对于
字节流和字符流,Java 都提供了对应的缓冲流,每一种缓冲流又有输入和输出之分。
- 上述的四个流是
高级流,是因为其需要依赖基本流,即:其是在基本流基础上增加了缓冲区。
java
public class BufferedInputStream extends FilterInputStream {

    public BufferedInputStream(InputStream in) {
        this(in, DEFAULT_BUFFER_SIZE);
    }

    ...
}java
public class BufferedOutputStream extends FilterOutputStream {

    public BufferedOutputStream(OutputStream out) {
        this(out, 8192);
    }

    ...
}java
public class BufferedReader extends Reader {

	public BufferedReader(Reader in) {
        this(in, defaultCharBufferSize);
    }

    ...
}java
public class BufferedWriter extends Writer {

    public BufferedWriter(Writer out) {
        this(out, defaultCharBufferSize);
    }

    ...
}2.2 字节缓冲流
2.2.1 概述
字节缓冲流分为字节缓冲输入流和字节缓冲输出流。
字节缓冲流提高性能的原因:在于底层自带了长度为8192的缓冲区。
提醒
利用缓冲区一次可以读写 8192 了字节,减少了 IO 操作的次数,从而提高了性能!!!
java
public class BufferedInputStream extends FilterInputStream {

    private static int DEFAULT_BUFFER_SIZE = 8192;

    protected volatile byte[] buf;

    public BufferedInputStream(InputStream in) {
        this(in, DEFAULT_BUFFER_SIZE);
    }

    public BufferedInputStream(InputStream in, int size) {
        super(in);
        if (size <= 0) {
            throw new IllegalArgumentException("Buffer size <= 0");
        }
        buf = new byte[size];
    }

}java
public class BufferedOutputStream extends FilterOutputStream {

    protected byte buf[];

    public BufferedOutputStream(OutputStream out) {
        this(out, 8192);
    }

    public BufferedOutputStream(OutputStream out, int size) {
        super(out);
        if (size <= 0) {
            throw new IllegalArgumentException("Buffer size <= 0");
        }
        buf = new byte[size];
    }
}2.2.2 常用 API
- 创建
字节缓冲输入流或字节缓冲输出流的对象:
| 构造方法 | 描述 |
|---|---|
public BufferedInputStream(InputStream in){} | 将基本流包装为高级流,提高了读取数据的性能 |
public BufferedOutputStream(OutputStream out) {} | 将基本流包装为高级流,提高了写出数据的性能 |
- 写出数据或读取数据:
| 方法名称 | 描述 |
|---|---|
public void write(int b) throws IOException {} | 一次写一个字节的数据 |
public void write(byte b[], int off, int len) throws IOException {} | 一次写入一个字节数组的一部分 |
public int read() throws IOException {} | 一次读取一个字节的数据 |
public int read(byte b[]) throws IOException {} | 一次读取多个字节的数据,并尽量将数组装满 |
- 释放流:
| 方法名称 | 描述 |
|---|---|
public void close() throws IOException {} | 释放资源 |
提醒
只需要关闭最外层的高级流就可以了,内部的基本流会帮我们关闭!!!
- 示例:复制文件
java
package com.github.io;

import java.io.*;

public class Test {
    public static void main(String[] args) throws IOException {
        // 创建字节缓冲流对象
        BufferedInputStream bis = new BufferedInputStream(
            new FileInputStream("d:\\a.txt"));
        BufferedOutputStream bos = new BufferedOutputStream(
            new FileOutputStream("d:\\b.txt"));

        // 复制文件
        int b;
        while ((b = bis.read()) != -1) {
            bos.write(b);
        }

        // 释放资源
        bos.close();
        bis.close();
    }

}
2.2.3 原理
- 当我们在创建
字节缓冲输入流对象的时候,如下所示:
java
BufferedInputStream bis = new BufferedInputStream(
new FileInputStream("d:\\a.txt"));- 相当于 Java 程序(内存)和文件(数据源)之间建立了一个连接的通道:
提醒
- ① 在内存中开辟了一个长度为 8192 的字节数组(缓冲区)!!!
- ② 真正从文件中读取数据的还是基本流 FileInputStream,其会从文件中读取数据,再交给字节缓冲输入流内部的缓冲区中。

- 当我们创建
字节缓冲输出流对象的时候,如下所示:
java
BufferedOutputStream bos = new BufferedOutputStream(
new FileOutputStream("day23\\b.txt"));- 相当于 Java 程序(内存)和文件(目的地)之间建立了一个连接的通道:
提醒
- ① 在内存中开辟了一个长度为 8192 的字节数组(缓冲区)!!!
- ② 真正将数据写出到从文件中的还是基本流 FileOutputStream,会将数据写出到缓冲流的缓冲区中,然后将缓冲区中的数据刷新到文件中。

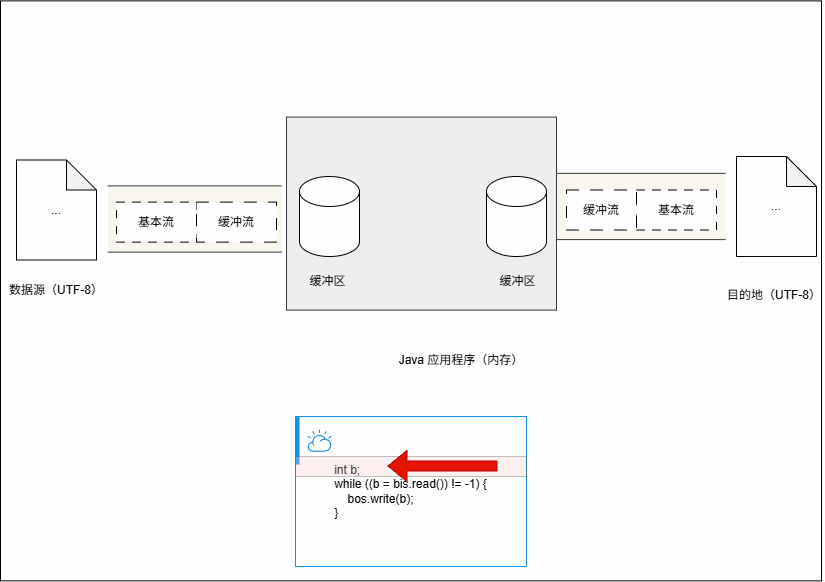
- 当我们通过循环对数据进行边读编写,如下所示:
java
int b;
while ((b = bis.read()) != -1) {
    bos.write(b);
}- 相当于内存中有一个临时变量 b,然后从
字节输入流的缓冲区中将数据复制到临时变量中,再将临时变量中的数据复制到字节输出流的缓冲区中。
提醒
- ① 基本流会从文件中读取数据,一次性会读取 8192 个字节数据,并存放到字节缓冲输入流缓冲区中。
- ② 中间变量 b ,就是在两个缓冲区之间不停地搬运数据。
- ③ 当字节缓冲输出流缓冲区满了,就会将数据交给基本流,让其自动的将数据刷新到文件中。
2.2.4 综合练习
需求:分别使用
基本流和缓冲流进行大文件的拷贝,并统计各自耗时。示例:
java
package com.github.io;

import java.io.*;
import java.time.Instant;
import java.time.temporal.ChronoUnit;

public class Test {
    public static void main(String[] args) throws IOException {
        File src = new File("D:\\ProPlus2021Retail.img");
        File dest = new File("D:\\ProPlus2021Retail-base.img");
        File dest2 = new File("D:\\ProPlus2021Retail-gender.img");

        System.out.println(copyFormBase(src, dest)); // 22853
        System.out.println(copyFormGender(src, dest2)); // 5603
    }

    public static long copyFormBase(File src, File dest) {
        Instant start = Instant.now();
        try (
                InputStream fis = new FileInputStream(src);
                OutputStream fos = new FileOutputStream(dest)) {
            byte[] buffer = new byte[1024];
            int len;
            while ((len = fis.read(buffer)) != -1) {
                fos.write(buffer, 0, len);
            }
        } catch (IOException e) {
            e.printStackTrace();
        }

        Instant end = Instant.now();
        return ChronoUnit.MILLIS.between(start, end);
    }


    public static long copyFormGender(File src, File dest) {
        Instant start = Instant.now();
        try (
                BufferedInputStream bis = new BufferedInputStream(
                    new FileInputStream(src));
                BufferedOutputStream bos = new BufferedOutputStream(
                    new FileOutputStream(dest))) {
            byte[] buffer = new byte[1024];
            int len;
            while ((len = bis.read(buffer)) != -1) {
                bos.write(buffer, 0, len);
            }
        } catch (IOException e) {
            e.printStackTrace();
        }

        Instant end = Instant.now();
        return ChronoUnit.MILLIS.between(start, end);
    }

}
2.3 字符缓冲流
2.3.1 概述
字符缓冲流分为字符缓冲输入流和字符缓冲输出流。
- 字符基本流本身就自带了 8192 的缓冲区,所以字符缓冲流的效率提升并不是很明显。
提醒
利用缓冲区一次可以读写 8192 了字符,减少了 IO 操作的次数,从而提高了性能!!!
java
public class BufferedReader extends Reader {

    private static int defaultCharBufferSize = 8192;

    private char[] cb;

    public BufferedReader(Reader in) {
        this(in, defaultCharBufferSize);
    }

    public BufferedReader(Reader in, int sz) {
        super(in);
        if (sz <= 0)
            throw new IllegalArgumentException("Buffer size <= 0");
        this.in = in;
        cb = new char[sz];
        nextChar = nChars = 0;
    }

}java
public class BufferedWriter extends Writer {

    private static int defaultCharBufferSize = 8192;

    private char cb[];

    public BufferedWriter(Writer out) {
        this(out, defaultCharBufferSize);
    }

    public BufferedWriter(Writer out, int sz) {
        super(out);
        if (sz <= 0)
            throw new IllegalArgumentException("Buffer size <= 0");
        this.out = out;
        cb = new char[sz];
        nChars = sz;
        nextChar = 0;
    }
}2.3.2 常用 API
- 创建
字符缓冲输入流或字符缓冲输出流的对象:
| 方法名称 | 描述 |
|---|---|
public BufferedReader(Reader in) {} | 将基本流包装为高级流,提高了读取数据的性能 |
public BufferedWriter(Writer out) {} | 将基本流包装为高级流,提高了写出数据的性能 |
- 写出数据或读取数据:
| 方法名称 | 描述 |
|---|---|
public void write(int c) throws IOException | 一次写一个字符的数据 |
public void write(String str) throws IOException{} | 一次写一个字符串的数据 |
public void write(String str, int off, int len) throws IOException{} | 一次写一个字符串的数据的一部分 |
public void write(char cbuf[]) throws IOException {} | 一次写一个字符数组 |
public void write(char cbuf[], int off, int len) throws IOException {} | 一次写字符数组的一部分 |
public void newLine() throws IOException {} | 跨平台换行【BufferedWriter 特有】 |
public int read() throws IOException{} | 一次读取一个字符的数据 |
public int read(char[] cbuf) throws IOException{} | 一次读取多个字符的数据,并尽量将数组装满 |
public String readLine() throws IOException{} | 一次读取一行数据;如果没有数据可读,返回 null【BufferedReader 特有】 |
- 释放资源:
| 方法名称 | 描述 |
|---|---|
public void close() throws IOException {} | 释放资源 |
- 示例:
java
package com.github.io;
import java.io.BufferedReader;
import java.io.FileReader;
import java.io.IOException;
public class Test {
public static void main(String[] args) throws IOException {
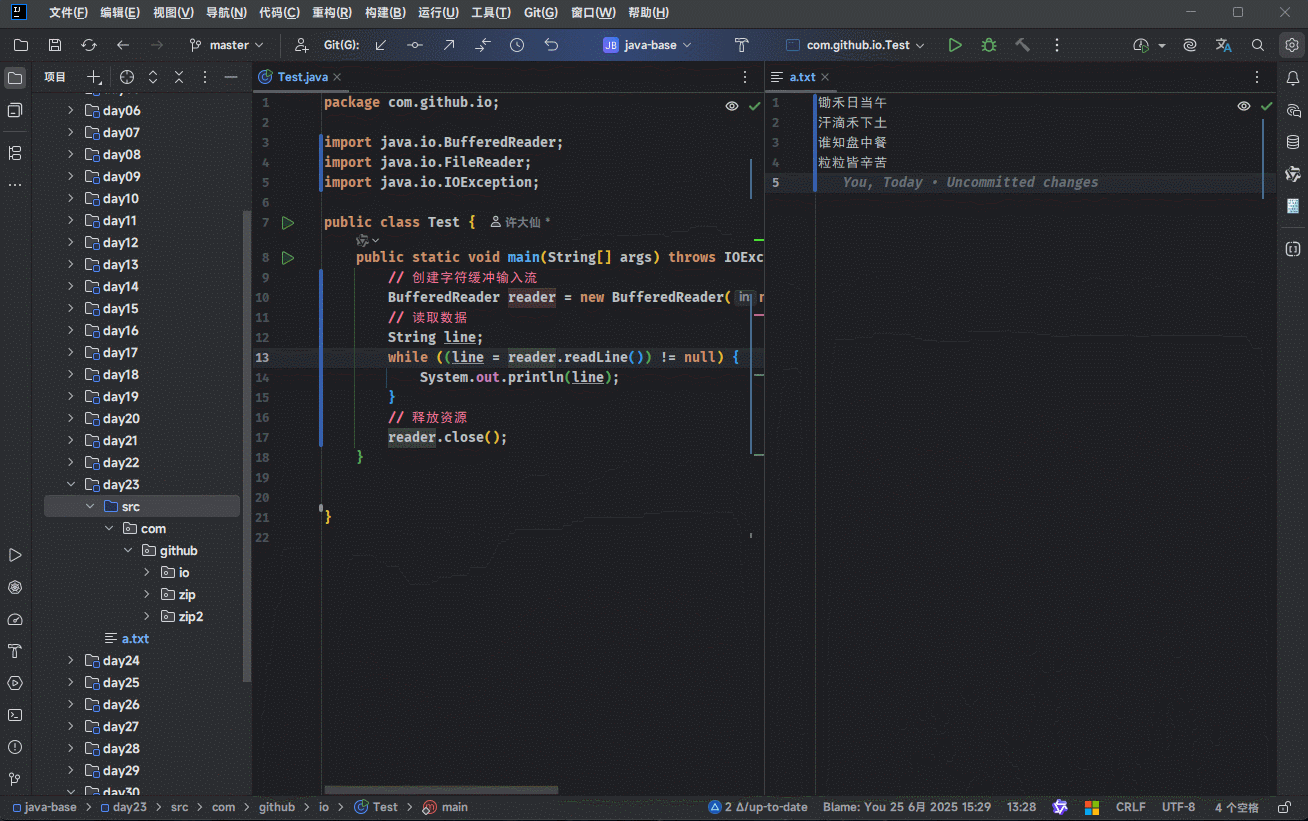
// 创建字符缓冲输入流
BufferedReader reader = new BufferedReader(
new FileReader("day23\\a.txt"));
// 读取数据
String line;
while ((line = reader.readLine()) != null) {
System.out.println(line);
}
// 释放资源
reader.close();
}
}
- 示例:
java
package com.github.io;
import java.io.BufferedWriter;
import java.io.FileWriter;
import java.io.IOException;
public class Test {
public static void main(String[] args) throws IOException {
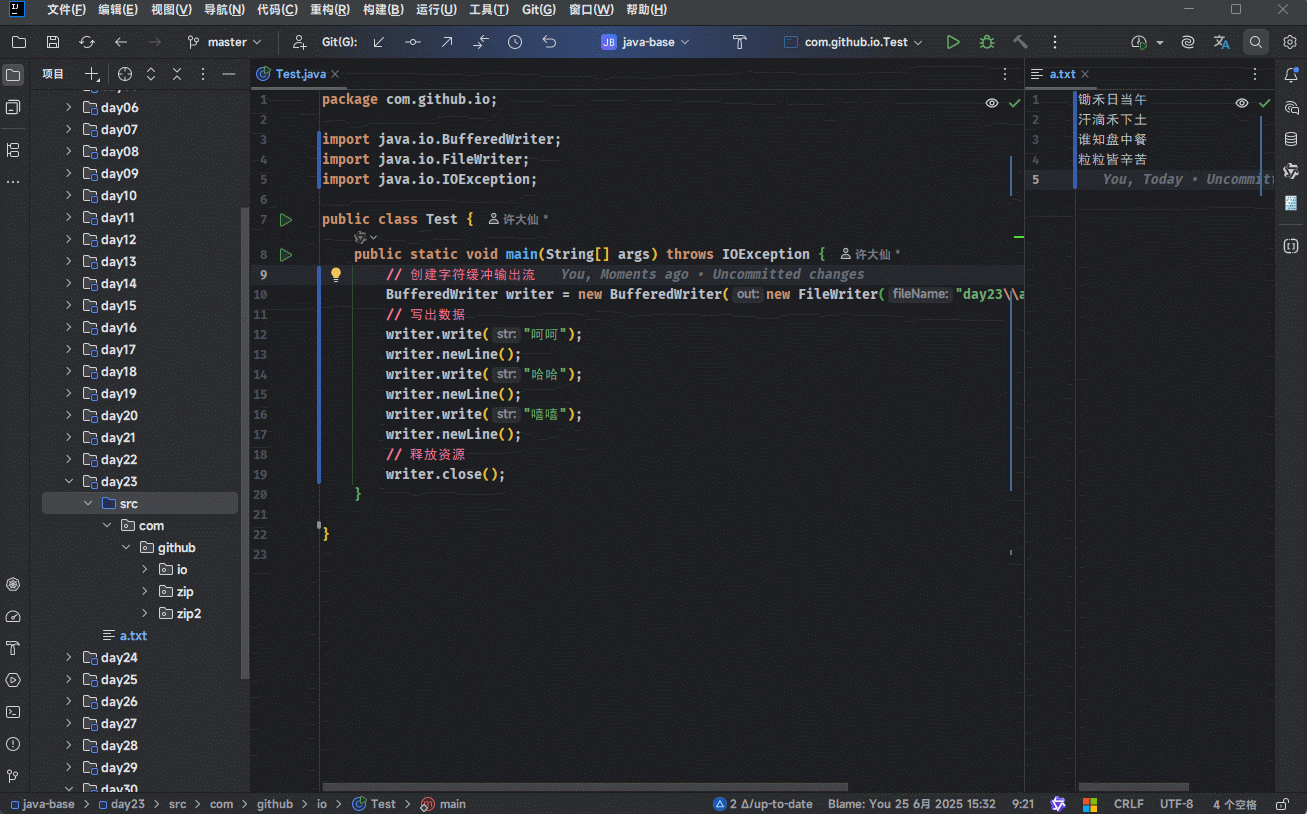
// 创建字符缓冲输出流
BufferedWriter writer = new BufferedWriter(
new FileWriter("day23\\a.txt", true));
// 写出数据
writer.write("呵呵");
writer.newLine();
writer.write("哈哈");
writer.newLine();
writer.write("嘻嘻");
writer.newLine();
// 释放资源
writer.close();
}
}
2.3.3 综合练习
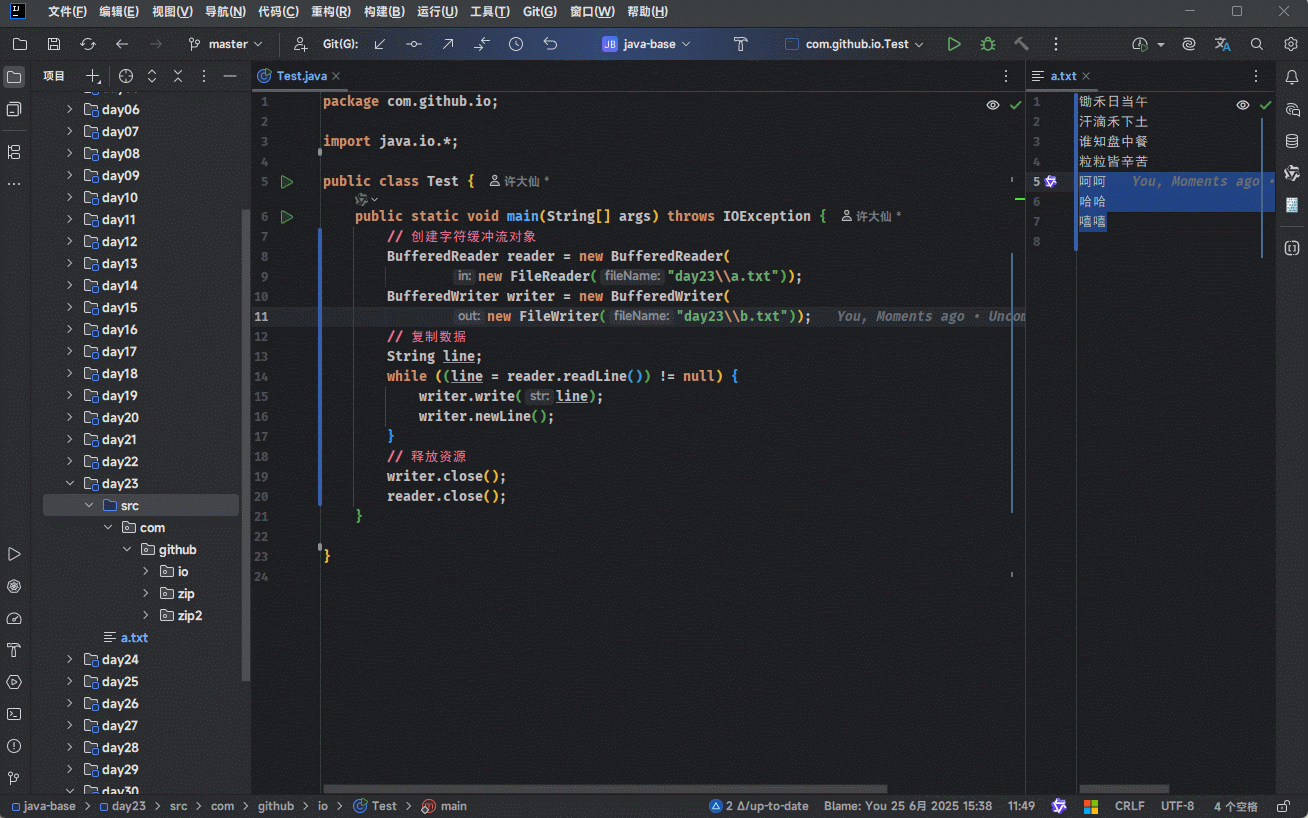
需求:复制文本文件。
示例:
java
package com.github.io;

import java.io.BufferedWriter;
import java.io.FileWriter;
import java.io.IOException;

public class Test {
    public static void main(String[] args) throws IOException {
        // 创建字符缓冲输出流
        BufferedWriter writer = new BufferedWriter(
            new FileWriter("day23\\a.txt", true));
        // 写出数据
        writer.write("呵呵");
        writer.newLine();
        writer.write("哈哈");
        writer.newLine();
        writer.write("嘻嘻");
        writer.newLine();
        // 释放资源
        writer.close();
    }

}
2.4 综合练习
2.4.1 综合练习一
- 需求:四种方式拷贝文件,并统计各自耗时。
提醒
- ① 字节流的基本流:一次读取一个字节。
- ② 字节流的基本流:一次读取一个字节数组。
- ② 字节流的缓冲流:一次读取一个字节。
- ③ 字节流的缓冲流:一次读取一个字节数组。
- 示例:
java
package com.github.io;

import java.io.*;
import java.time.Instant;
import java.time.temporal.ChronoUnit;

public class Test {
    public static void main(String[] args) throws IOException {
        File src = new File("D:\\movie.mp4");
        File dest1 = new File("D:\\movie-1.mp4");
        File dest2 = new File("D:\\movie-2.mp4");
        File dest3 = new File("D:\\movie-3.mp4");
        File dest4 = new File("D:\\movie-4.mp4");

        System.out.println(copyFormBase(src, dest1)); // 118194
        System.out.println(copyFormBase1024(src, dest2)); // 156
        System.out.println(copyFormGender(src, dest3)); // 276
        System.out.println(copyFormGender1024(src, dest4)); // 42

    }


    public static long copyFormBase(File src, File dest) {
        Instant start = Instant.now();
        try (
                InputStream fis = new FileInputStream(src);
                OutputStream fos = new FileOutputStream(dest)) {
            int b;
            while ((b = fis.read()) != -1) {
                fos.write(b);
            }
        } catch (IOException e) {
            e.printStackTrace();
        }

        Instant end = Instant.now();
        return ChronoUnit.MILLIS.between(start, end);
    }

    public static long copyFormBase1024(File src, File dest) {
        Instant start = Instant.now();
        try (
                InputStream fis = new FileInputStream(src);
                OutputStream fos = new FileOutputStream(dest)) {
            byte[] buffer = new byte[1024];
            int len;
            while ((len = fis.read(buffer)) != -1) {
                fos.write(buffer, 0, len);
            }
        } catch (IOException e) {
            e.printStackTrace();
        }

        Instant end = Instant.now();
        return ChronoUnit.MILLIS.between(start, end);
    }

    public static long copyFormGender(File src, File dest) {
        Instant start = Instant.now();
        try (
                BufferedInputStream bis = new BufferedInputStream(
                        new FileInputStream(src));
                BufferedOutputStream bos = new BufferedOutputStream(
                        new FileOutputStream(dest))) {
            int b;
            while ((b = bis.read()) != -1) {
                bos.write(b);
            }
        } catch (IOException e) {
            e.printStackTrace();
        }

        Instant end = Instant.now();
        return ChronoUnit.MILLIS.between(start, end);
    }

    public static long copyFormGender1024(File src, File dest) {
        Instant start = Instant.now();
        try (
                BufferedInputStream bis = new BufferedInputStream(
                        new FileInputStream(src));
                BufferedOutputStream bos = new BufferedOutputStream(
                        new FileOutputStream(dest))) {
            byte[] buffer = new byte[1024];
            int len;
            while ((len = bis.read(buffer)) != -1) {
                bos.write(buffer, 0, len);
            }
        } catch (IOException e) {
            e.printStackTrace();
        }

        Instant end = Instant.now();
        return ChronoUnit.MILLIS.between(start, end);
    }

}
2.4.2 综合练习二
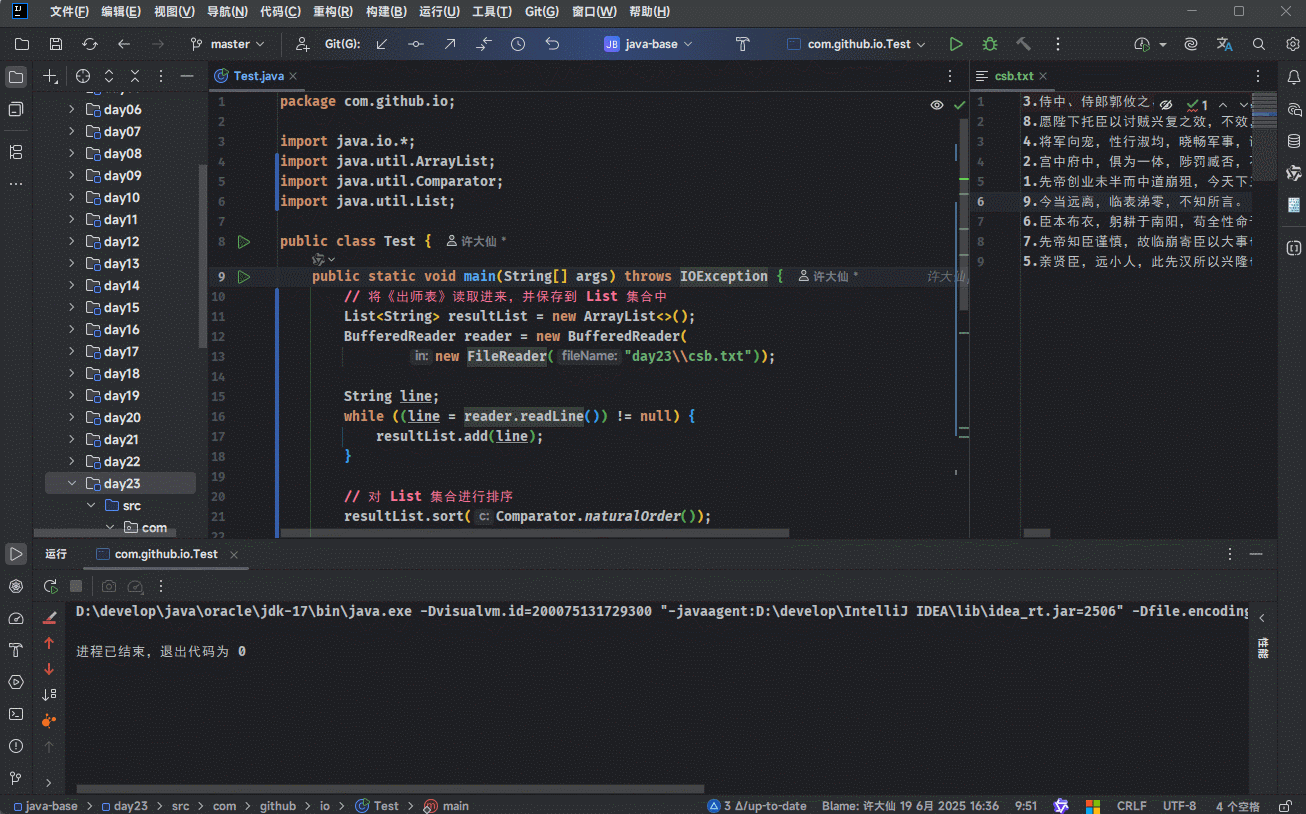
- 需求:将《出师表》的文章顺序按照从小到大排序,然后再写回到文件中。
提醒
《出师表》文章的内容,如下所示:
txt
3.侍中、侍郎郭攸之、费祎、董允等,此皆良实,志虑忠纯,是以先帝简拔以遗陛下。愚以为宫中之事,事无大小,悉以咨之,然后施行,必得裨补阙漏,有所广益。
8.愿陛下托臣以讨贼兴复之效,不效,则治臣之罪,以告先帝之灵。若无兴德之言,则责攸之、祎、允等之慢,以彰其咎;陛下亦宜自谋,以咨诹善道,察纳雅言,深追先帝遗诏,臣不胜受恩感激。
4.将军向宠,性行淑均,晓畅军事,试用之于昔日,先帝称之曰能,是以众议举宠为督。愚以为营中之事,悉以咨之,必能使行阵和睦,优劣得所。
2.宫中府中,俱为一体,陟罚臧否,不宜异同。若有作奸犯科及为忠善者,宜付有司论其刑赏,以昭陛下平明之理,不宜偏私,使内外异法也。
1.先帝创业未半而中道崩殂,今天下三分,益州疲弊,此诚危急存亡之秋也。然侍卫之臣不懈于内,忠志之士忘身于外者,盖追先帝之殊遇,欲报之于陛下也。诚宜开张圣听,以光先帝遗德,恢弘志士之气,不宜妄自菲薄,引喻失义,以塞忠谏之路也。
9.今当远离,临表涕零,不知所言。
6.臣本布衣,躬耕于南阳,苟全性命于乱世,不求闻达于诸侯。先帝不以臣卑鄙,猥自枉屈,三顾臣于草庐之中,咨臣以当世之事,由是感激,遂许先帝以驱驰。后值倾覆,受任于败军之际,奉命于危难之间,尔来二十有一年矣。
7.先帝知臣谨慎,故临崩寄臣以大事也。受命以来,夙夜忧叹,恐付托不效,以伤先帝之明,故五月渡泸,深入不毛。今南方已定,兵甲已足,当奖率三军,北定中原,庶竭驽钝,攘除奸凶,兴复汉室,还于旧都。此臣所以报先帝而忠陛下之职分也。至于斟酌损益,进尽忠言,则攸之、祎、允之任也。
5.亲贤臣,远小人,此先汉所以兴隆也;亲小人,远贤臣,此后汉所以倾颓也。先帝在时,每与臣论此事,未尝不叹息痛恨于桓、灵也。侍中、尚书、长史、参军,此悉贞良死节之臣,愿陛下亲之信之,则汉室之隆,可计日而待也。- 示例:
java
package com.github.io;

import java.io.*;
import java.util.ArrayList;
import java.util.Comparator;
import java.util.List;

public class Test {
    public static void main(String[] args) throws IOException {
        // 将《出师表》读取进来,并保存到 List 集合中
        List<String> resultList = new ArrayList<>();
        BufferedReader reader = new BufferedReader(
                new FileReader("day23\\csb.txt"));

        String line;
        while ((line = reader.readLine()) != null) {
            resultList.add(line);
        }
		reader.close();

        // 对 List 集合进行排序
        resultList.sort(Comparator.naturalOrder());

        // 写回到文件中
        BufferedWriter writer = new BufferedWriter(
                new FileWriter("day23\\csb.txt"));

        resultList.forEach(str -> {
            try {
                writer.write(str);
                writer.newLine();
            } catch (IOException e) {
                throw new RuntimeException(e);
            }
        });

        writer.close();

    }
}
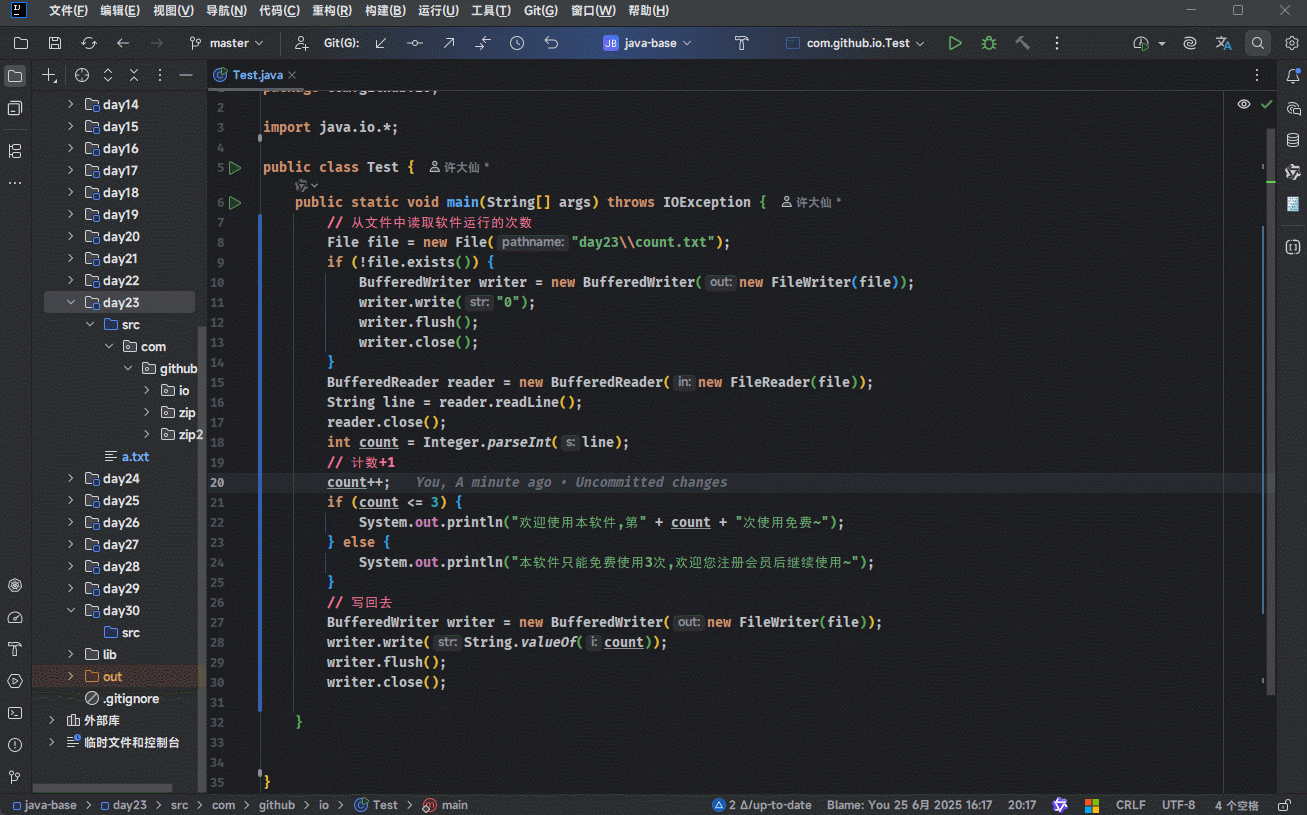
2.4.3 综合练习三
- 需要:控制软件运行的次数。
提醒
- ① 当程序运行超过 3 次的时候给出提示:本软件只能免费使用 3 次,欢迎您注册会员后继续使用~
- ② 程序运行演示如下:
- 第一次运行控制台输出:欢迎使用本软件,第 1 次使用免费~
- 第二次运行控制台输出:欢迎使用本软件,第 2 次使用免费~
- 第三次运行控制台输出:欢迎使用本软件,第 3 次使用免费~
- 第四次及之后运行控制台输出:本软件只能免费使用 3 次,欢迎您注册会员后继续使用~
- 示例:
java
package com.github.io;

import java.io.*;

public class Test {
    public static void main(String[] args) throws IOException {
        // 从文件中读取软件运行的次数
        File file = new File("day23\\count.txt");
        if (!file.exists()) {
            BufferedWriter writer = new BufferedWriter(new FileWriter(file));
            writer.write("0");
            writer.flush();
            writer.close();
        }
        BufferedReader reader = new BufferedReader(new FileReader(file));
        String line = reader.readLine();
        reader.close();
        int count = Integer.parseInt(line);
        // 计数+1
        count++;
        if (count <= 3) {
            System.out.println("欢迎使用本软件,第" + count + "次使用免费~");
        } else {
            System.out.println("本软件只能免费使用3次,欢迎您注册会员后继续使用~");
        }
        // 写回去
        BufferedWriter writer = new BufferedWriter(new FileWriter(file));
        writer.write(String.valueOf(count));
        writer.flush();
        writer.close();

    }

}
第三章:转换流(⭐)
3.1 概述
转换流也是一种高级流,其是用来包装基本流的,并且转换流也有输入和输出之分。
- 当我们创建转换流对象用来读取数据时,如下所示:
java
InputStreamReader reader = new InputStreamReader(new FileInputStream("?"));- 其底层是将字节输入流转换为字符输入流(解码)。
提醒
- ① 读取数据不会乱码。
- ② 可以根据指定的字符集一次读取多个字节。

- 当我们创建转换流对象用来写出数据时,如下所示:
java
OutputStreamWriter writer = new OutputStreamWriter(new FileOutputStream("?"));- 其底层是将字符输出流转换为字节输出流(编码)。
提醒
- ① 写出数据不会乱码。
- ② 可以根据指定的字符集一次写出多个字节。

- 其实,字符流的基本流 FileReader 和 FileWriter 的底层就是转换流:
java
public class FileReader extends InputStreamReader {
    ...
}java
public class FileWriter extends OutputStreamWriter {
    ...
}3.2 应用场景
- 转换流的应用场景:
- ① 指定字符集进行读写。
- ② 字节流想要使用字符流中的方法。
提醒
转化流的作用已经不是那么重要了,有如下的几个方面:
- ① 在实际开发中,我们会统一使用 UTF-8 编码来进行开发,如:Tomcat(早期有过一段时间使用 ISO8859-1 编码;但是,现在都统一为 UTF-8 编码)、SpringBoot 等。
- ② 在 JDK11 的时候,FileReader 和 FileWriter 也增加了指定字符集来进行读写的功能。
- ③ 在 JDK18 的时候,FileReader 和 FileWriter 不再使用本地字符集(Windows 简体中文,默认是 GBK)来进行读写,而统一采取 UTF-8 来进行读写。
3.3 综合练习
3.3.1 综合练习一
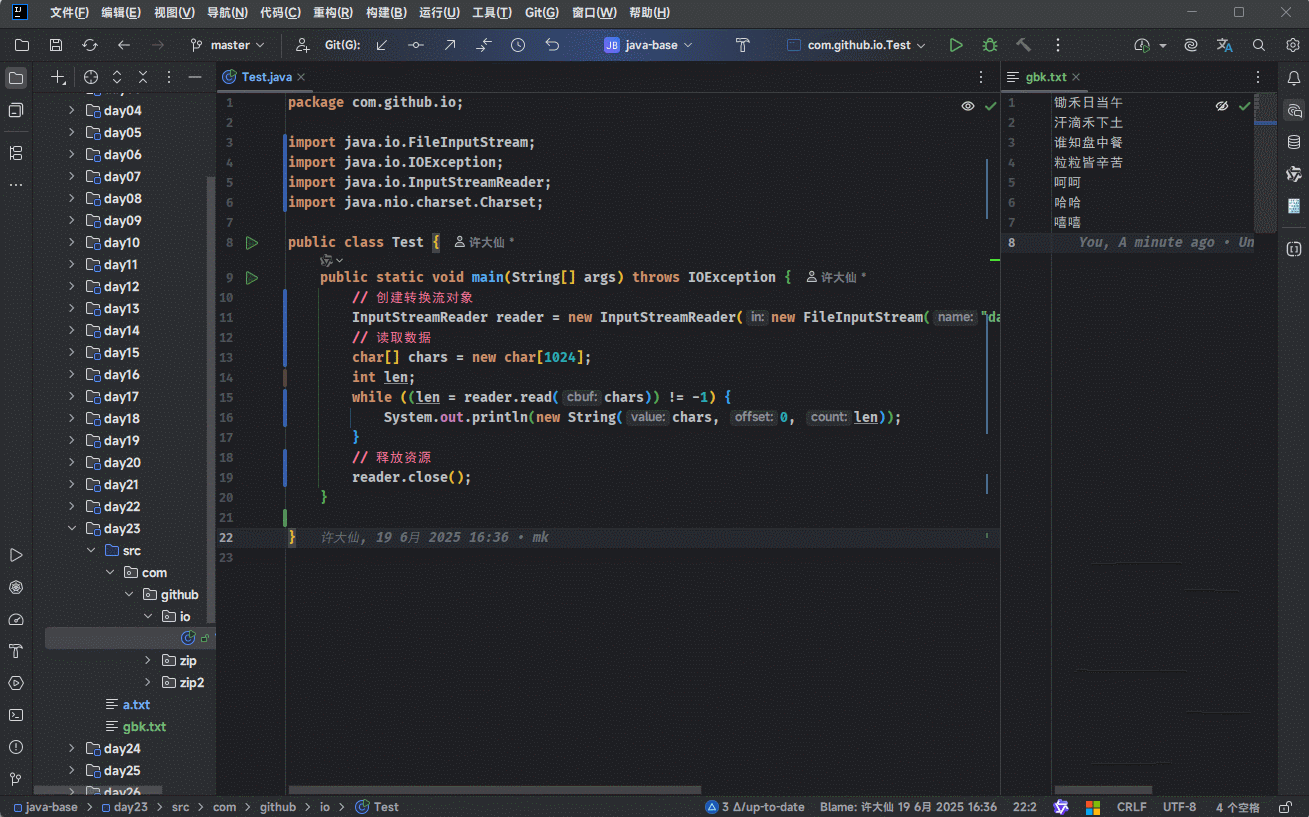
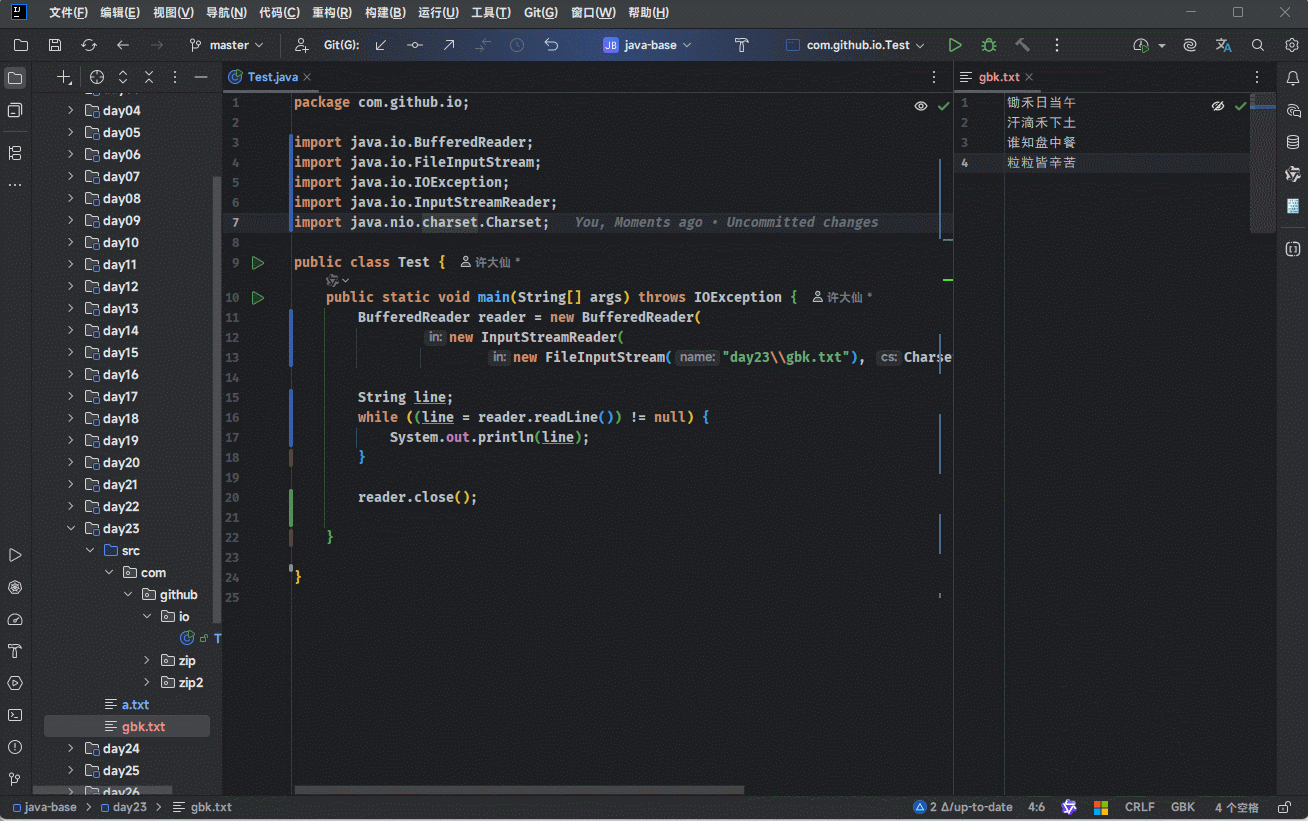
需求:将一个 GBK 编码的文件读取到内存中,不能出现乱码。
示例:
java
package com.github.io;

import java.io.FileInputStream;
import java.io.IOException;
import java.io.InputStreamReader;
import java.nio.charset.Charset;

public class Test {
    public static void main(String[] args) throws IOException {
        // 创建转换流对象
        InputStreamReader reader = new InputStreamReader(
            new FileInputStream("day23\\gbk.txt"), Charset.forName("GBK"));
        // 读取数据
        char[] chars = new char[1024];
        int len;
        while ((len = reader.read(chars)) != -1) {
            System.out.println(new String(chars, 0, len));
        }
        // 释放资源
        reader.close();
    }

}
3.3.2 综合练习二
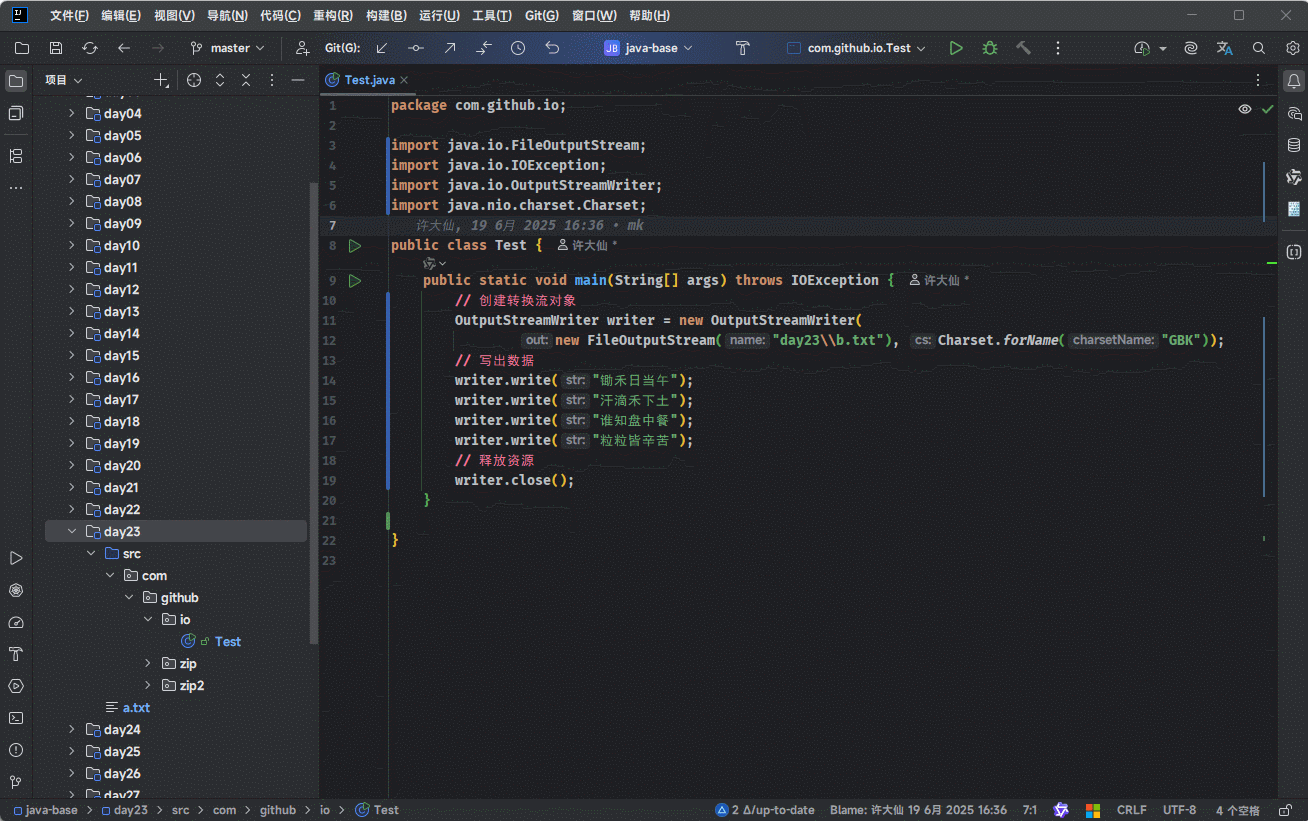
- 需求:将一段中文按照 GBK 的方式写到本地文件中。
java
package com.github.io;

import java.io.FileOutputStream;
import java.io.IOException;
import java.io.OutputStreamWriter;
import java.nio.charset.Charset;

public class Test {
    public static void main(String[] args) throws IOException {
        // 创建转换流对象
        OutputStreamWriter writer = new OutputStreamWriter(
                new FileOutputStream("day23\\b.txt"), Charset.forName("GBK"));
        // 写出数据
        writer.write("锄禾日当午");
        writer.write("汗滴禾下土");
        writer.write("谁知盘中餐");
        writer.write("粒粒皆辛苦");
        // 释放资源
        writer.close();
    }

}
3.3.3 综合练习三
- 需求:将本地文件中的 GBK 文件,转换成 UTF-8 文件。
java
package com.github.io;
import java.io.*;
import java.nio.charset.Charset;
import java.nio.charset.StandardCharsets;
import java.util.ArrayList;
import java.util.List;
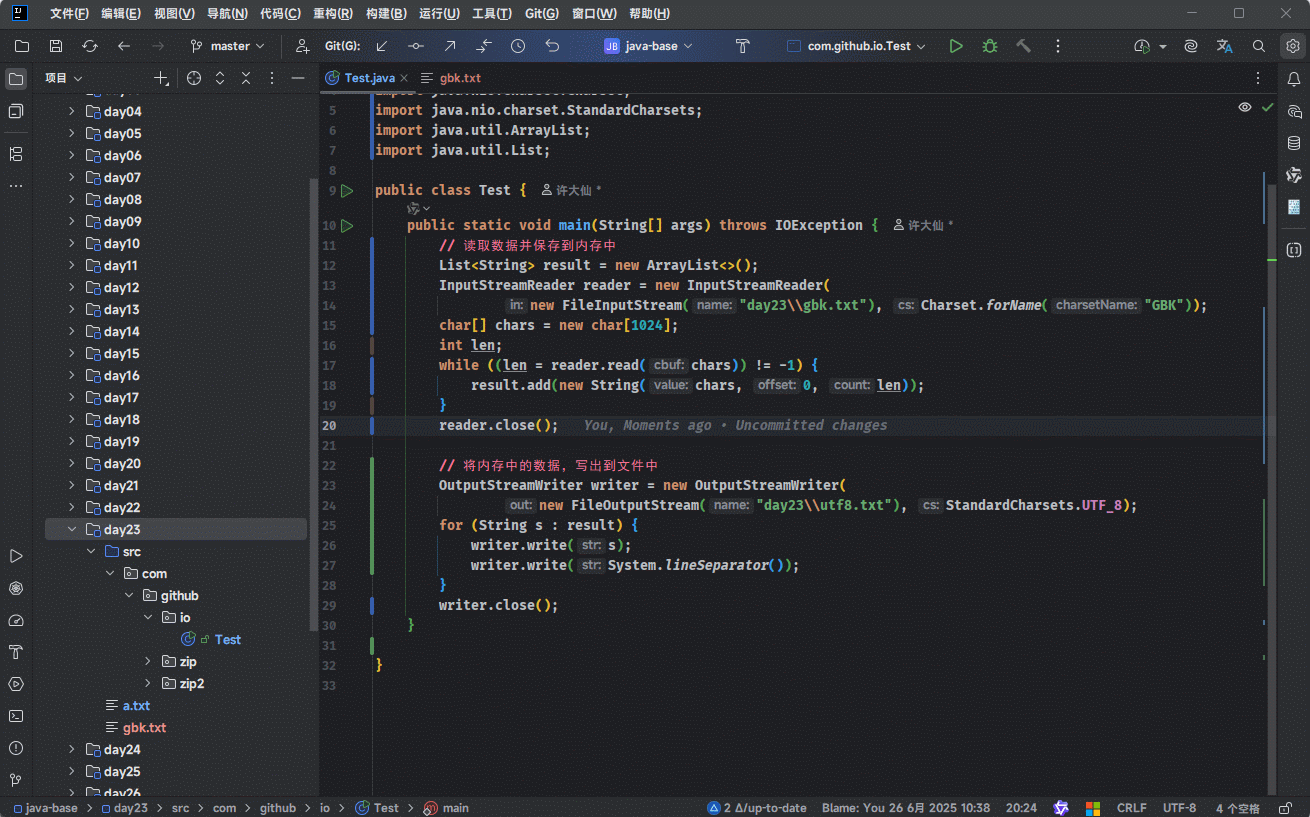
public class Test {
public static void main(String[] args) throws IOException {
// 读取数据并保存到内存中
List<String> result = new ArrayList<>();
InputStreamReader reader = new InputStreamReader(
new FileInputStream("day23\\gbk.txt"), Charset.forName("GBK"));
char[] chars = new char[1024];
int len;
while ((len = reader.read(chars)) != -1) {
result.add(new String(chars, 0, len));
}
reader.close();
// 将内存中的数据,写出到文件中
OutputStreamWriter writer = new OutputStreamWriter(
new FileOutputStream("day23\\utf8.txt"), StandardCharsets.UTF_8);
for (String s : result) {
writer.write(s);
writer.write(System.lineSeparator());
}
writer.close();
}
}
3.3.4 综合练习四
- 需求:利用字节流读取文件中的数据,每次读取一整行,而且不能出现乱码。
提醒
- ① 利用字节流读取文件中的数据,并且不能出现乱码,就可以联想到 InputStreamReader。
- ② 每次读取一整行,就可以联想到 BufferedReader。
java
package com.github.io;

import java.io.*;
import java.nio.charset.Charset;
import java.nio.charset.StandardCharsets;
import java.util.ArrayList;
import java.util.List;

public class Test {
    public static void main(String[] args) throws IOException {
        // 读取数据并保存到内存中
        List<String> result = new ArrayList<>();
        InputStreamReader reader = new InputStreamReader(
                new FileInputStream("day23\\gbk.txt"), Charset.forName("GBK"));
        char[] chars = new char[1024];
        int len;
        while ((len = reader.read(chars)) != -1) {
            result.add(new String(chars, 0, len));
        }
        reader.close();

        // 将内存中的数据,写出到文件中
        OutputStreamWriter writer = new OutputStreamWriter(
                new FileOutputStream("day23\\utf8.txt"), StandardCharsets.UTF_8);
        for (String s : result) {
            writer.write(s);
            writer.write(System.lineSeparator());
        }
        writer.close();
    }

}
第四章:序列化流
4.1 概述
- 序列化流也是高级流,其是用来包装基本流的,并且序列化流是字节流的一种。
提醒
- ① 序列化流负责输出数据,即:将 Java 中的对象(内存中的数据)写出到本地文件中。
- ② 反序列化流负责读取数据,即:将本地文件中的数据读取为 Java 中的对象(内存中的数据)。
4.2 序列化流
4.2.1 概述
- 序列化流可以将 Java 中的对象(内存中的数据)写到本地文件中。

提醒
实现序列化流的前提条件:JavaBean 需要实现 java.io.Serializable 接口。
4.2.2 步骤
- ① 创建序列化流对象:
| 构造方法 | 描述 |
|---|---|
public ObjectOutputStream(OutputStream out) {} | 将基本流包装成高级流 |
- ② 写出数据:
| 成员方法 | 描述 |
|---|---|
public final void writeObject(Object obj){} | 将对象序列化后写出到文件中 |
- ③ 关闭流:
| 成员方法 | 描述 |
|---|---|
public void close() {} | 释放资源 |
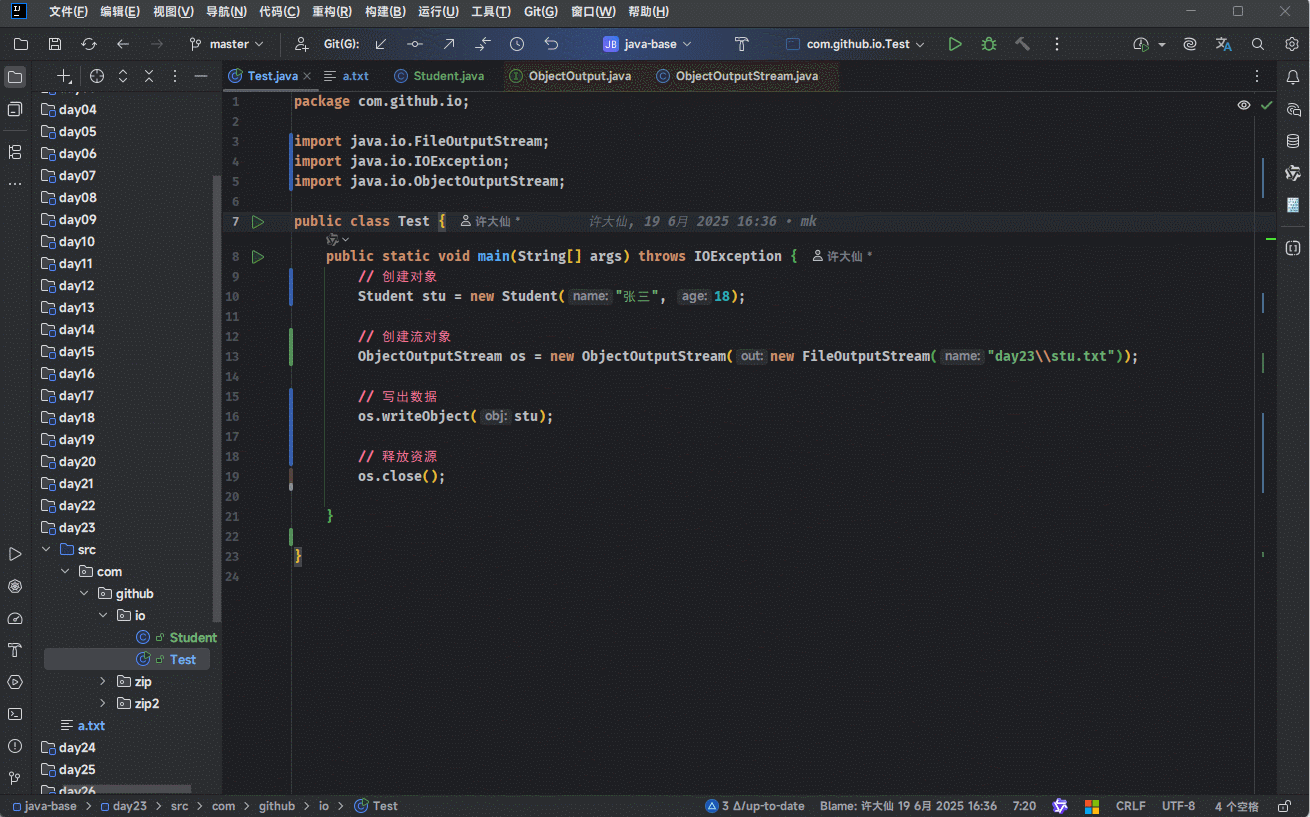
- 示例:
java
package com.github.io;

import java.io.Serializable;

public class Student implements Serializable {

    private String name;

    private int age;

    public Student(String name, int age) {
        this.name = name;
        this.age = age;
    }

    public String getName() {
        return name;
    }

    public void setName(String name) {
        this.name = name;
    }

    public int getAge() {
        return age;
    }

    public void setAge(int age) {
        this.age = age;
    }

    @Override
    public String toString() {
        return "Student{" +
                "name='" + name + '\'' +
                ", age=" + age +
                '}';
    }
}java
package com.github.io;
import java.io.FileOutputStream;
import java.io.IOException;
import java.io.ObjectOutputStream;
public class Test {
public static void main(String[] args) throws IOException {
// 创建对象
Student stu = new Student("张三", 18);
// 创建流对象
ObjectOutputStream os = new ObjectOutputStream(
new FileOutputStream("day23\\stu.txt"));
// 写出数据
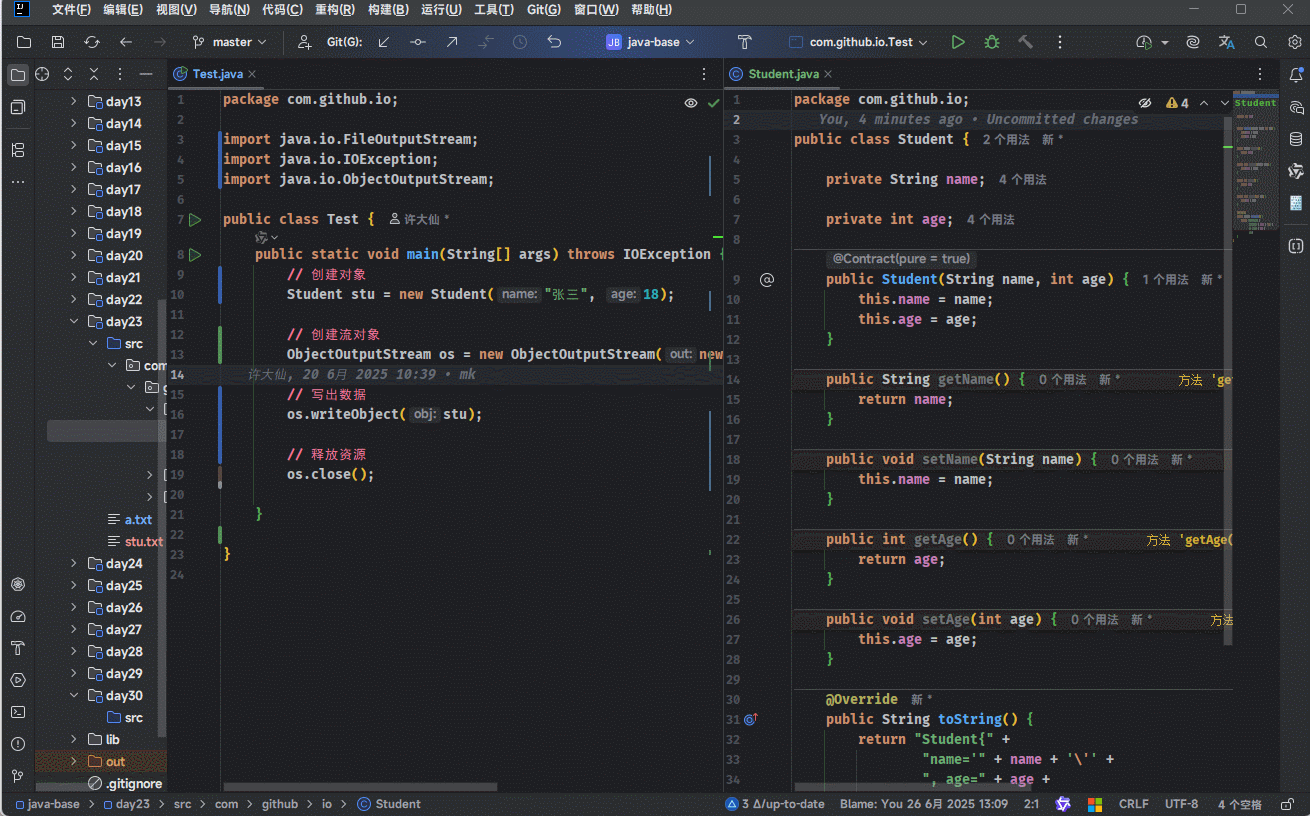
os.writeObject(stu);
// 释放资源
os.close();
}
}
4.3 反序列化流
4.3.1 概述
- 反序列化流可以将序列化到本地文件中的对象,读取到程序中。

4.3.2 步骤
- ① 创建反序列化流对象:
| 构造方法 | 描述 |
|---|---|
public ObjectInputStream(InputStream in) {} | 将基本流包装成高级流 |
- ② 写出数据:
| 成员方法 | 描述 |
|---|---|
public final Object readObject() {} | 序列化到本地文件中的对象,读取到程序中 |
- ③ 关闭流:
| 成员方法 | 描述 |
|---|---|
public void close() {} | 释放资源 |
- 示例:
java
package com.github.io;

import java.io.Serializable;

public class Student implements Serializable {

    private String name;

    private int age;

    public Student(String name, int age) {
        this.name = name;
        this.age = age;
    }

    public String getName() {
        return name;
    }

    public void setName(String name) {
        this.name = name;
    }

    public int getAge() {
        return age;
    }

    public void setAge(int age) {
        this.age = age;
    }

    @Override
    public String toString() {
        return "Student{" +
                "name='" + name + '\'' +
                ", age=" + age +
                '}';
    }
}java
package com.github.io;

import java.io.FileInputStream;
import java.io.IOException;
import java.io.ObjectInputStream;

public class Test {
    public static void main(String[] args) throws IOException, ClassNotFoundException {
        // 创建流对象
        ObjectInputStream oi = new ObjectInputStream(
            new FileInputStream("day23\\stu.txt"));

        // 写出数据
        Student student = (Student) oi.readObject();
        System.out.println(student);

        // 释放资源
        oi.close();

    }

}
4.4 细节
4.4.1 细节一
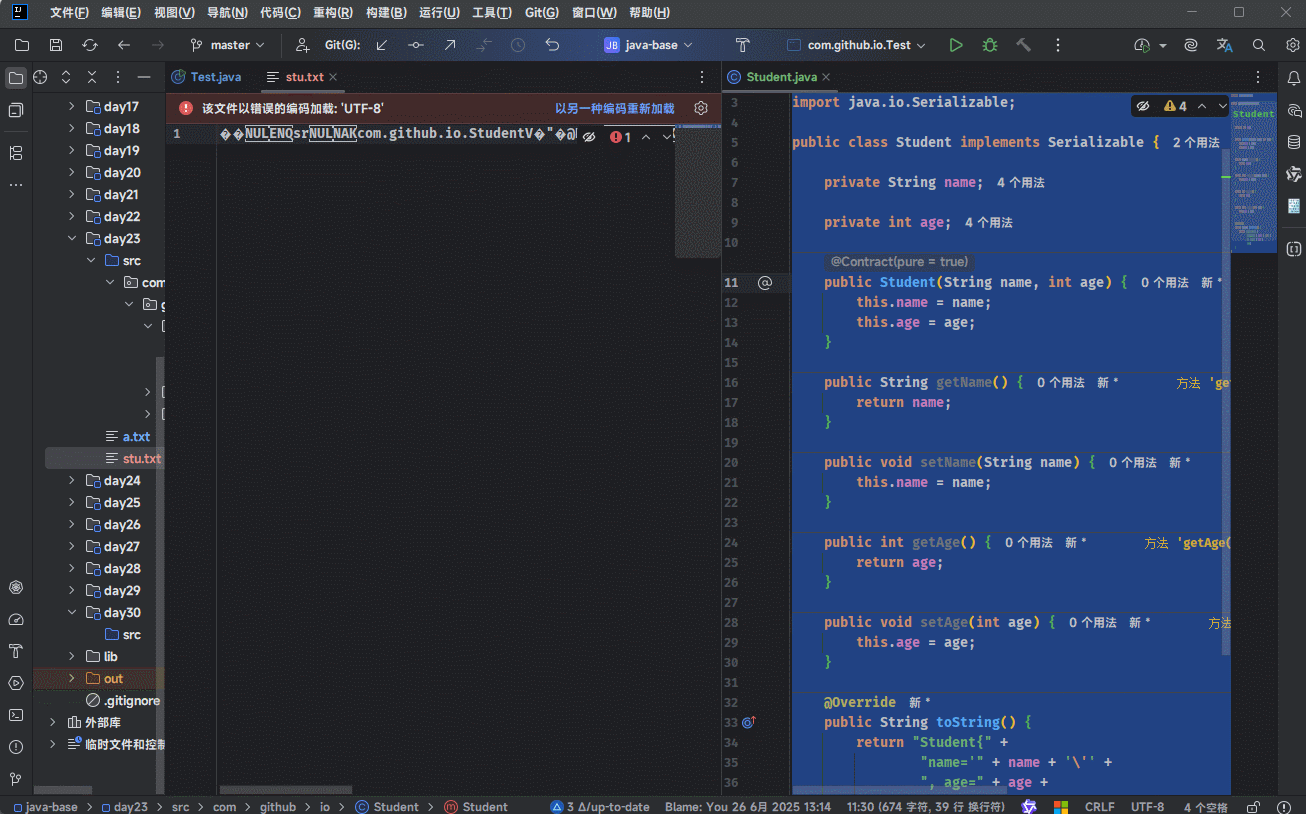
JavaBean不实现java.io.Serializable接口,会出现NotSerializableException异常。
提醒
解决方案:让JavaBean实现java.io.Serializable接口!!!
- 示例:
java
package com.github.io;


public class Student  {

    private String name;

    private int age;

    public Student(String name, int age) {
        this.name = name;
        this.age = age;
    }

    public String getName() {
        return name;
    }

    public void setName(String name) {
        this.name = name;
    }

    public int getAge() {
        return age;
    }

    public void setAge(int age) {
        this.age = age;
    }

    @Override
    public String toString() {
        return "Student{" +
                "name='" + name + '\'' +
                ", age=" + age +
                '}';
    }
}java
package com.github.io;

import java.io.FileOutputStream;
import java.io.IOException;
import java.io.ObjectOutputStream;

public class Test {
    public static void main(String[] args) throws IOException {
        // 创建对象
        Student stu = new Student("张三", 18);

        // 创建流对象
        ObjectOutputStream os = new ObjectOutputStream(
            new FileOutputStream("day23\\stu.txt"));

        // 写出数据
        os.writeObject(stu);

        // 释放资源
        os.close();

    }

}
4.4.2 细节二
- 如果一个类实现了
Serializable接口,就表明这个类的对象是可序列化的:
java
public class Student implements Serializable {

    private String name;

    private int age;

    ...
}- Java 在底层会根据类的信息,如:类名、包名、成员变量、静态变量、构造方法等生成一个
serialVersionUID,在序列化对象的时候,JVM 会将serialVersionUID和类的其他元数据一同写入本地文件中,这个过程是自动的。

- 在反序列化的时候,Java 底层也会将本地文件中的
serialVersionUID和当前类的字节码文件计算出来的serialVersionUID进行比较,如果不匹配,将会报错。

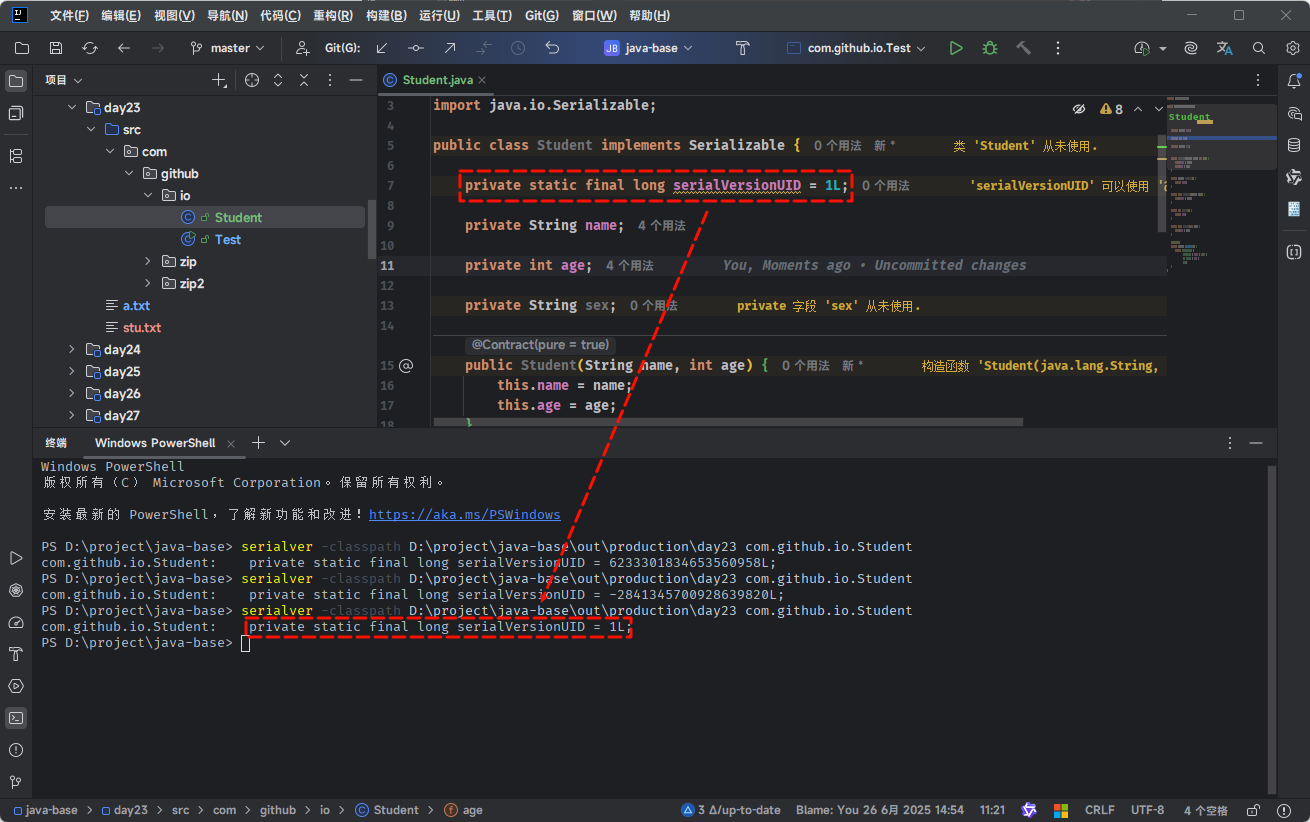
- 我们可以通过
serialver命令来计算出对应的serialVersionUID:
bash
serialver -classpath D:\project\java-base\out\production\day23 com.github.io.Student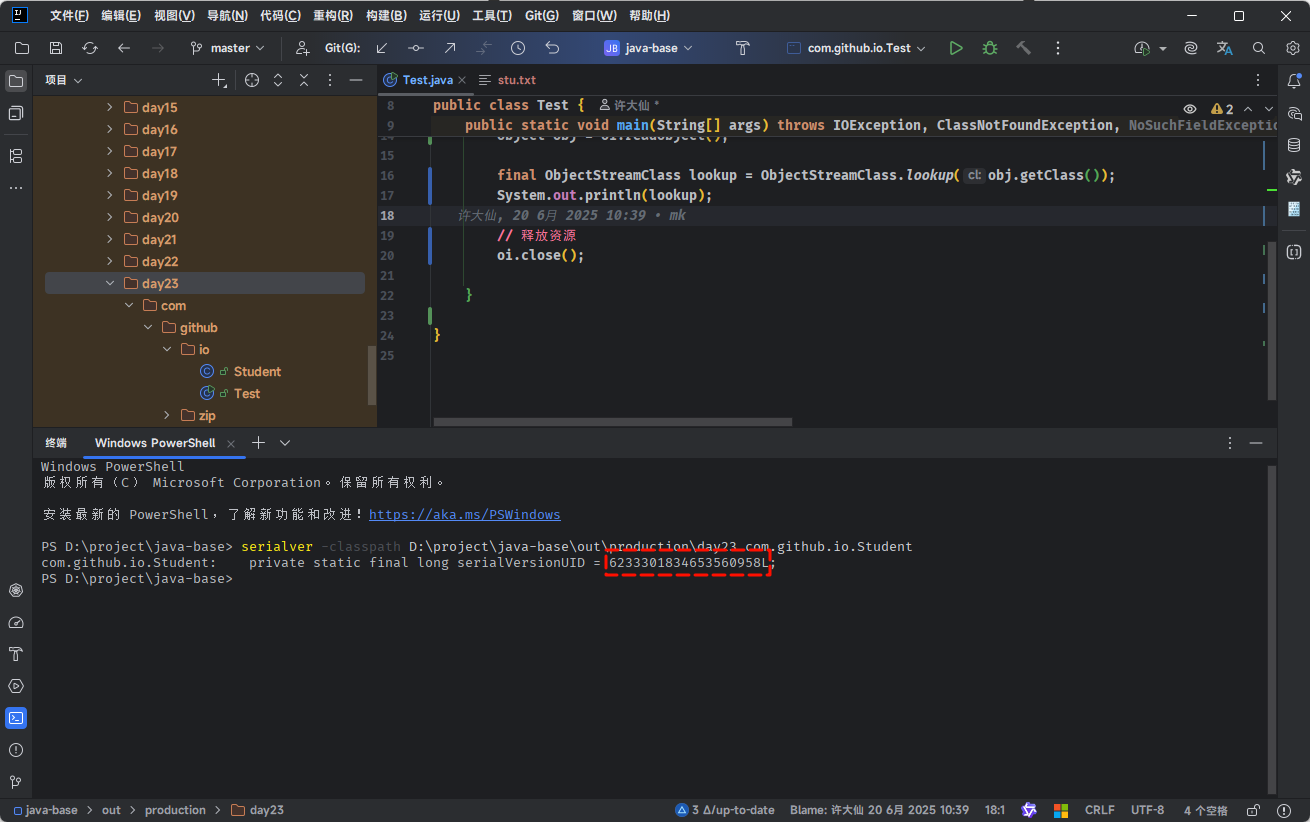
- 我们可以通过反序列化来读取文件中的
serialVersionUID:
java
package com.github.io;
import java.io.FileInputStream;
import java.io.IOException;
import java.io.ObjectInputStream;
import java.io.ObjectStreamClass;
public class Test {
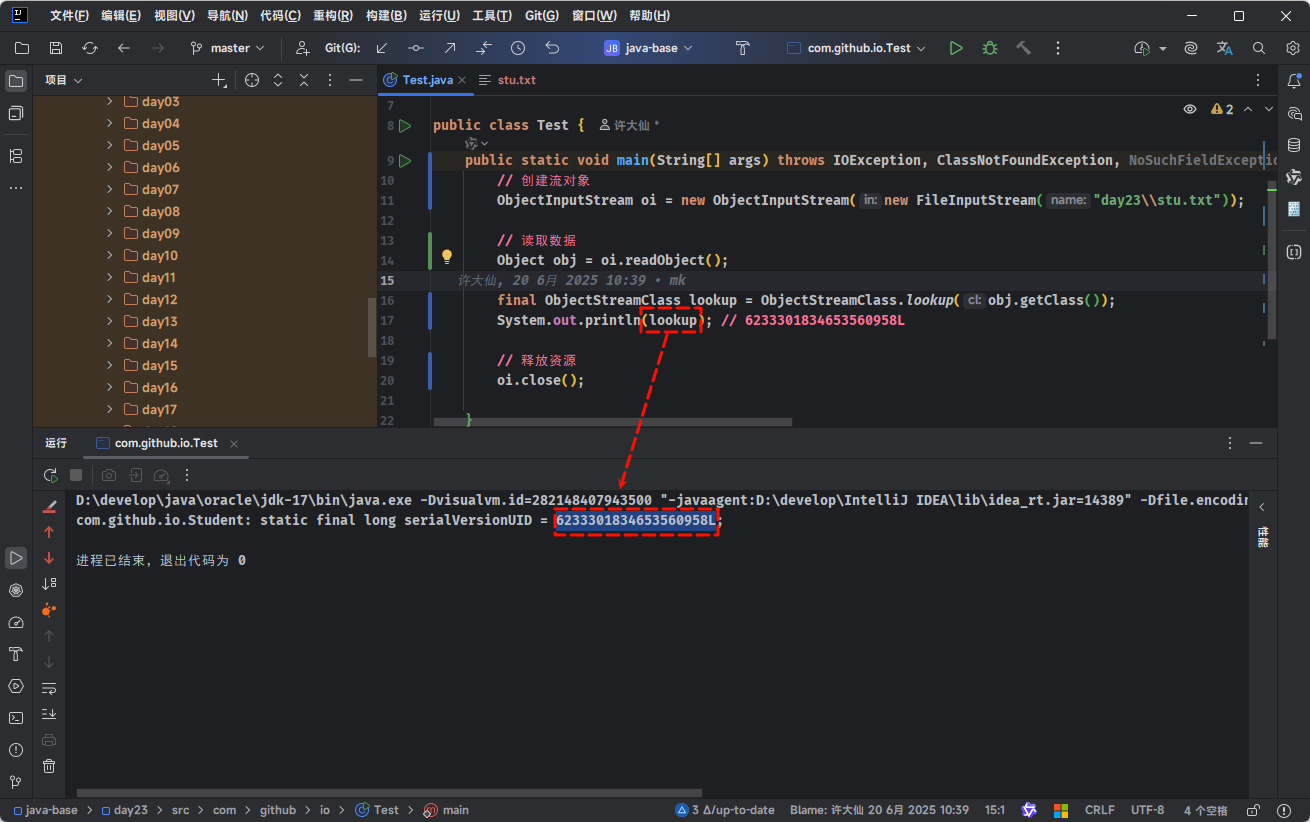
public static void main(String[] args) throws Exception {
// 创建流对象
ObjectInputStream oi = new ObjectInputStream(
new FileInputStream("day23\\stu.txt"));
// 读取数据
Object obj = oi.readObject();
ObjectStreamClass lookup = ObjectStreamClass.lookup(obj.getClass());
System.out.println(lookup); // 6233301834653560958L
// 释放资源
oi.close();
}
}
- 换言之,只要我们修改了类的信息,Java 底层就会自动计算
serialVersionUID:
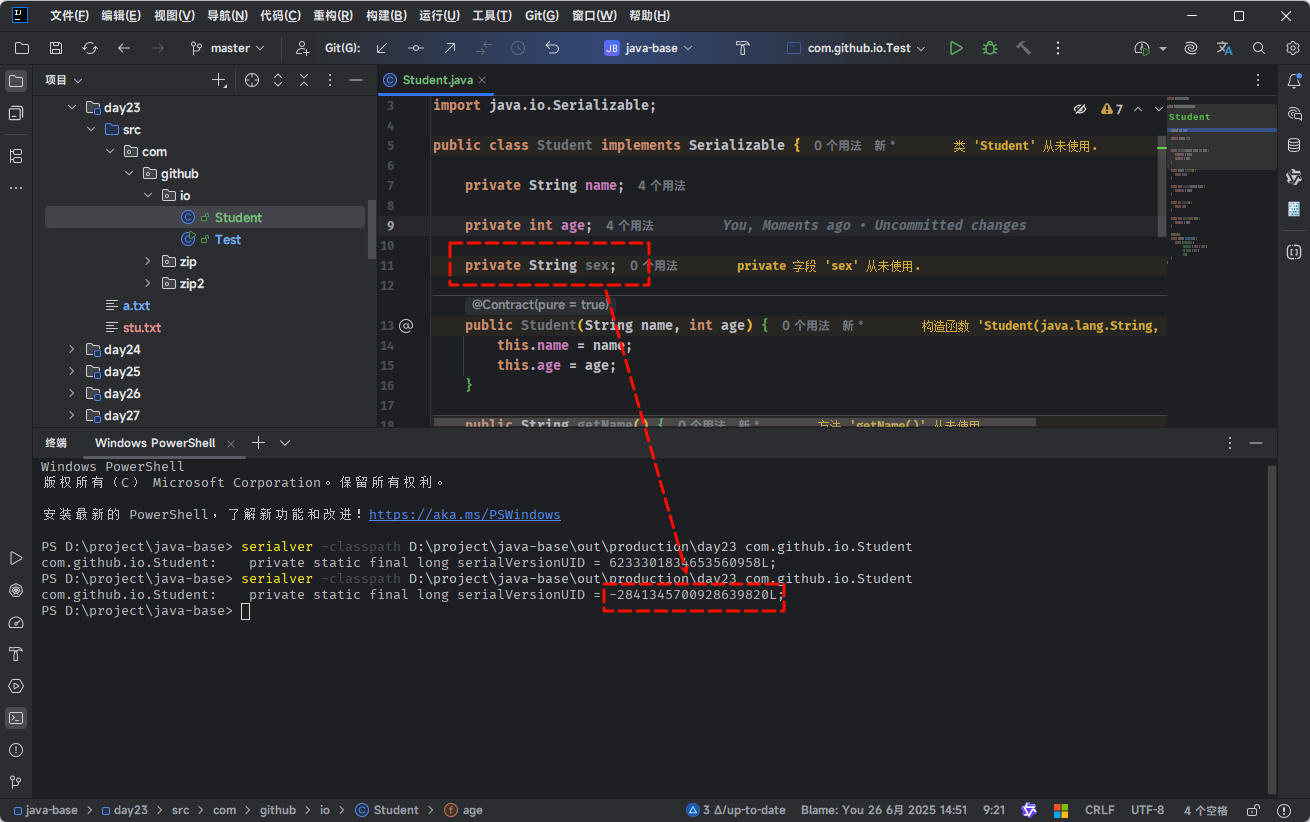
- 在实际开发中,随着业务的发展,我们绝对有可能去修改类的信息,为了避免文件中的版本号和JavaBean中的版本号不匹配而引发错误,我们只需要在类中显示声明
serialVersionUID,Java 就不会在自动计算,而使用我们自己提供的值。
提醒
- ① 如果没有显示声明
serialVersionUID,Java 会自动计算并存储一个serialVersionUID,这个值是基于类的字节码的。 - ② 如果已经显示声明
serialVersionUID,Java 就不会自动计算它,只会使用我们提供的值。
java
package com.github.io;

import java.io.Serializable;

public class Student implements Serializable {

    private static final long serialVersionUID = 1L;

    private String name;

    private int age;

    private String sex;

    public Student(String name, int age) {
        this.name = name;
        this.age = age;
    }

    public String getName() {
        return name;
    }

    public void setName(String name) {
        this.name = name;
    }

    public int getAge() {
        return age;
    }

    public void setAge(int age) {
        this.age = age;
    }

    @Override
    public String toString() {
        return "Student{" +
                "name='" + name + '\'' +
                ", age=" + age +
                '}';
    }
}
- 我们可以开启快速生成
serialVersionUID的功能:
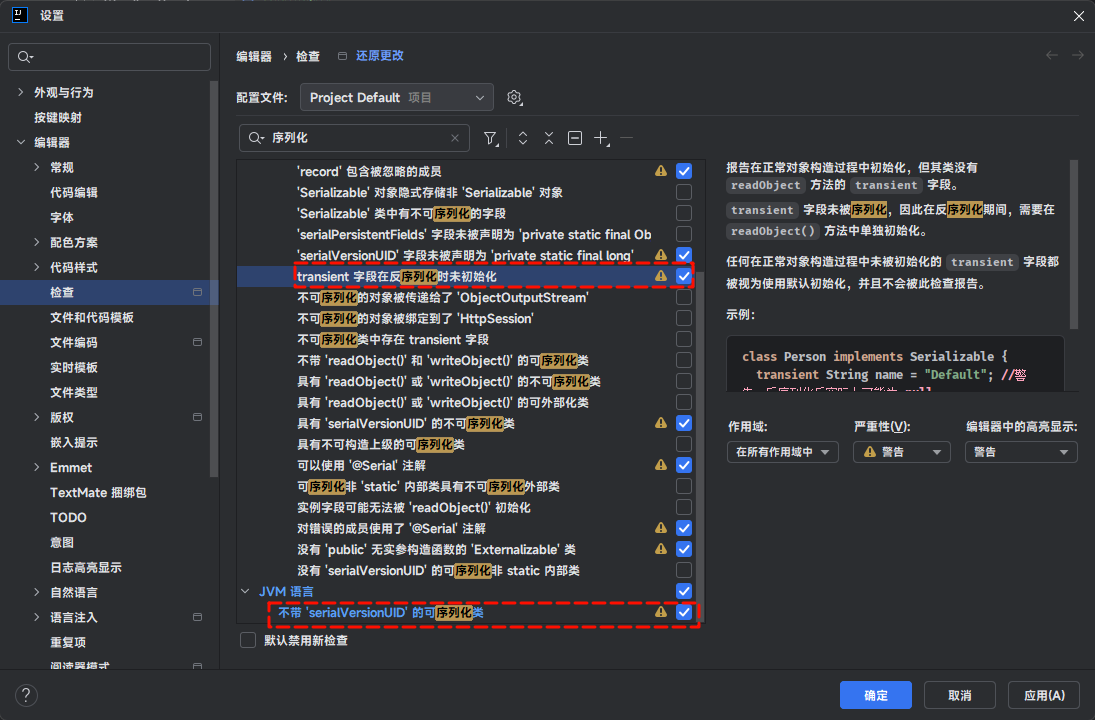
- 这样,我们在写代码的时候,就可以让 IDEA 帮我们计算
serialVersionUID了:
4.5 综合练习
- 需求:将多个自定义对象序列到文件中,并进行反序列化。
提醒
使用 List 集合存储多个自定义对象,并将 List 集合进行序列化到文件中;同理,反序列化就是相反操作。
- 示例:
java
package com.github.io;

import java.io.Serializable;

public class Student implements Serializable {

    private String name;

    private int age;

    public Student(String name, int age) {
        this.name = name;
        this.age = age;
    }

    public String getName() {
        return name;
    }

    public void setName(String name) {
        this.name = name;
    }

    public int getAge() {
        return age;
    }

    public void setAge(int age) {
        this.age = age;
    }

    @Override
    public String toString() {
        return "Student{" +
                "name='" + name + '\'' +
                ", age=" + age +
                '}';
    }
}java
package com.github.io;

import java.io.FileInputStream;
import java.io.FileOutputStream;
import java.io.ObjectInputStream;
import java.io.ObjectOutputStream;
import java.util.ArrayList;
import java.util.List;

public class Test {
    public static void main(String[] args) throws Exception {
        List<Student> list = new ArrayList<>();
        list.add(new Student("张三", 18));
        list.add(new Student("李四", 19));
        list.add(new Student("王五", 20));

        serializable(list);

        List<Student> list2 = deserializable();
        list2.forEach(System.out::println);
    }

    public static void serializable(List<Student> list) {
        try (ObjectOutputStream oos = new ObjectOutputStream(
            new FileOutputStream("student.txt"))) {
            // 将list写入文件
            oos.writeObject(list);
        } catch (Exception e) {
            e.printStackTrace();
        }
    }

    public static List<Student> deserializable() {
        try (ObjectInputStream ois = new ObjectInputStream(
            new FileInputStream("student.txt"))) {
            return (List<Student>) ois.readObject();
        } catch (Exception e) {
            e.printStackTrace();
        }
        return new ArrayList<>();
    }

}
4.6 展望
由于以下原因,在实际开发中,我们并不建议使用 Java 内置的序列化。
- ①
安全性差:Java 序列化允许任意类型反序列化,容易被攻击。 - ②
性能差:序列化后的体积大,效率低。 - ③
不可控、脆弱:一个类结构稍微变动就可能导致反序列化失败。 - ④
黑盒机制:对开发者几乎是不可见的魔法,难以调试和管理。
- ①
我们可以使用其他替代方案:
| 替代方案 | 特点 |
|---|---|
| Jackson / Gson(JSON) | 简单、可读、安全,适合 Web 应用 |
| Kryo | 高性能二进制序列化,适用于分布式系统,如:Spark |
| Protobuf | Google 出品,结构清晰、高压缩率、跨语言支持强 |
第五章:打印流(⭐)
5.1 概述
- 打印流是高级流,其是用来保证基本流的;但是,打印流只能写,不能读。
提醒
打印流只能是输出流!!!
- 其实,我们之前经常使用的
打印语句就是字节打印流:
java
public final class System {

    public static final PrintStream out = null;

}5.2 特点
① 打印流只能操作文件的目的地,不能操作数据源。
② 特有的写出方法可以实现,数据原样输出,即:print() 方法或 println() 方法。
③ 特有的写出方法,可以实现自动刷新,自动换行,即:println() 方法
5.3 字节打印流
- 创建字节打印流对象:
| 构造方法 | 描述 |
|---|---|
public PrintStream(OutputStream/File/String) {} | 关联字节输出流、文件、文件路径 |
public PrintStream(String fileName, Charset charset){} | 指定字符编码 |
public PrintStream(OutputStream out, boolean autoFlush) {} | 自动刷新 |
public PrintStream(OutputStream out, boolean autoFlush, Charset charset) {} | 指定字符编码且自动刷新 |
提醒
字节流底层没有缓冲区,开不开自动刷新都一样!!!
- 写出数据:
| 成员方法 | 描述 |
|---|---|
public void write(int b) {} | 常规方法:规则和之前一样,将指定的字节写出 |
public void println(XXX x) {} | 特有方法:打印任意数据,自动刷新,自动换行 |
public void print(Xxx b) {} | 特有方法:打印任意数据,不换行 |
public PrintStream printf(String format, Object...args) {} | 特有方法:带有占位符的打印语句,不换行 |
- 关闭流:
| 成员方法 | 描述 |
|---|---|
public void close() {} | 释放资源 |
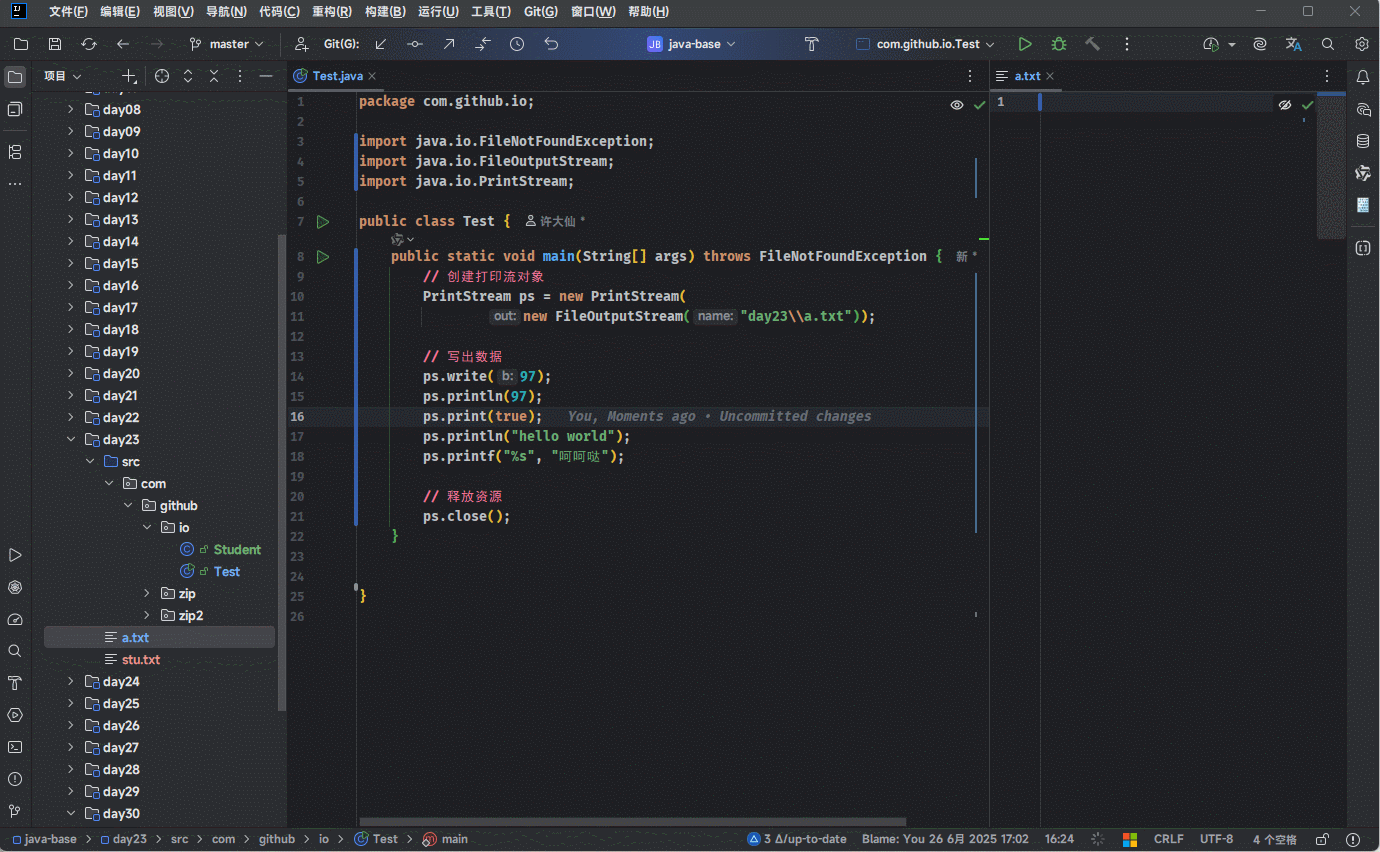
- 示例:
java
package com.github.io;

import java.io.FileNotFoundException;
import java.io.FileOutputStream;
import java.io.PrintStream;

public class Test {
    public static void main(String[] args) throws FileNotFoundException {
        // 创建打印流对象
        PrintStream ps = new PrintStream(
                new FileOutputStream("day23\\a.txt"));

        // 写出数据
        ps.write(97);
        ps.println(97);
        ps.print(true);
        ps.println("hello world");
        ps.printf("%s", "呵呵哒");

        // 释放资源
        ps.close();
    }

}
5.4 字符打印流
- 创建字节打印流对象:
| 构造方法 | 描述 |
|---|---|
public PrintWriter(Writer/File/String) {} | 关联字符输出流、文件、文件路径 |
public PrintWriter(String fileName, Charset charset){} | 指定字符编码 |
public PrintWriter(Writer out, boolean autoFlush) {} | 自动刷新 |
public PrintWriter(Writer out, boolean autoFlush, Charset charset) {} | 指定字符编码且自动刷新 |
提醒
字符流底层有缓冲区,开不开自动刷新不一样!!!
- 写出数据:
| 成员方法 | 描述 |
|---|---|
public void write(int b) {} | 常规方法:规则和之前一样,将指定的字节写出 |
public void println(XXX x) {} | 特有方法:打印任意数据,自动刷新,自动换行 |
public void print(Xxx b) {} | 特有方法:打印任意数据,不换行 |
public PrintStream printf(String format, Object...args) {} | 特有方法:带有占位符的打印语句,不换行 |
- 关闭流:
| 成员方法 | 描述 |
|---|---|
public void close() {} | 释放资源 |
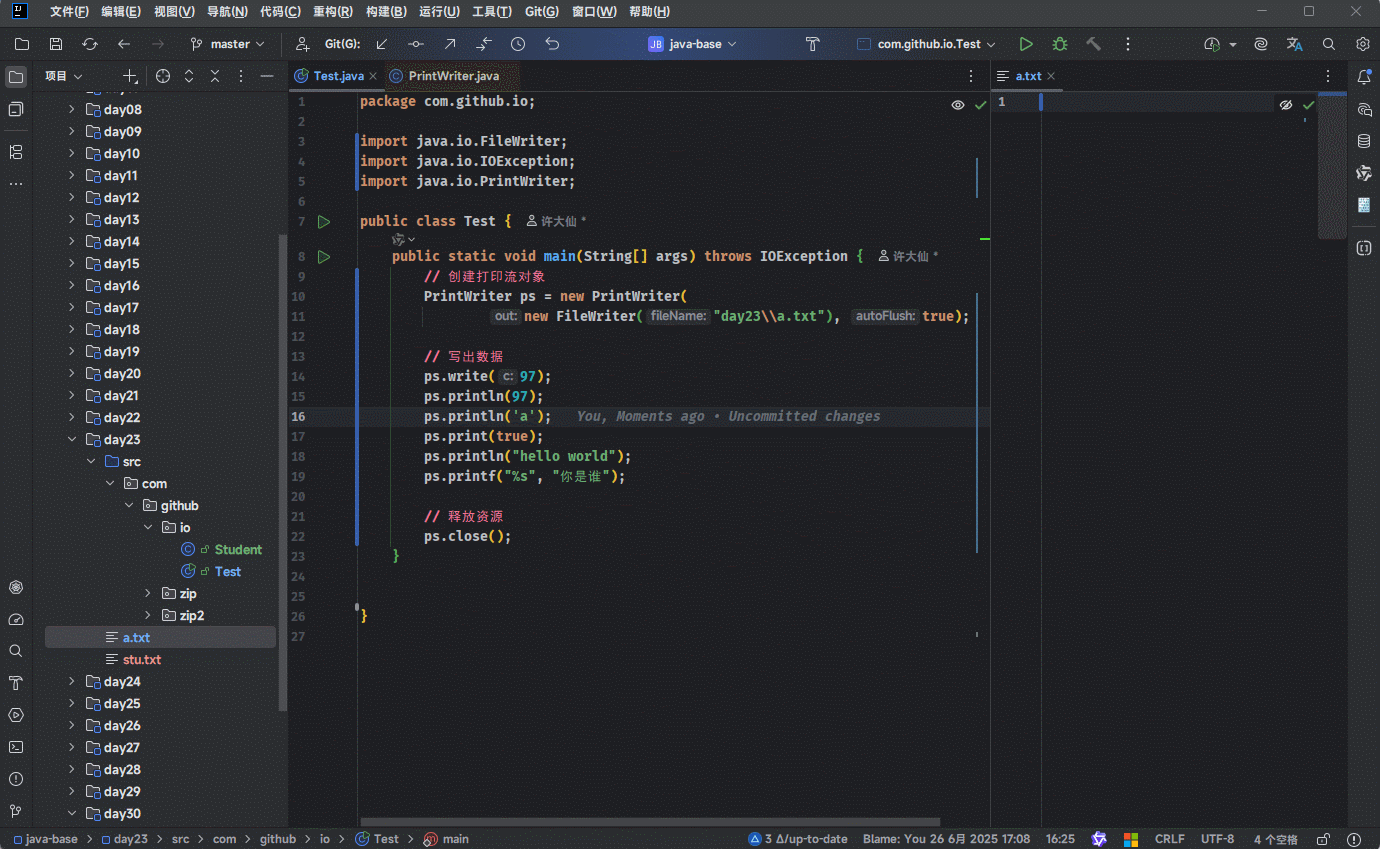
- 示例:
java
package com.github.io;

import java.io.FileWriter;
import java.io.IOException;
import java.io.PrintWriter;

public class Test {
    public static void main(String[] args) throws IOException {
        // 创建打印流对象
        PrintWriter ps = new PrintWriter(
                new FileWriter("day23\\a.txt"), true);

        // 写出数据
        ps.write(97);
        ps.println(97);
        ps.println('a');
        ps.print(true);
        ps.println("hello world");
        ps.printf("%s", "你是谁");

        // 释放资源
        ps.close();
    }

}
5.5 打印流的应用场景
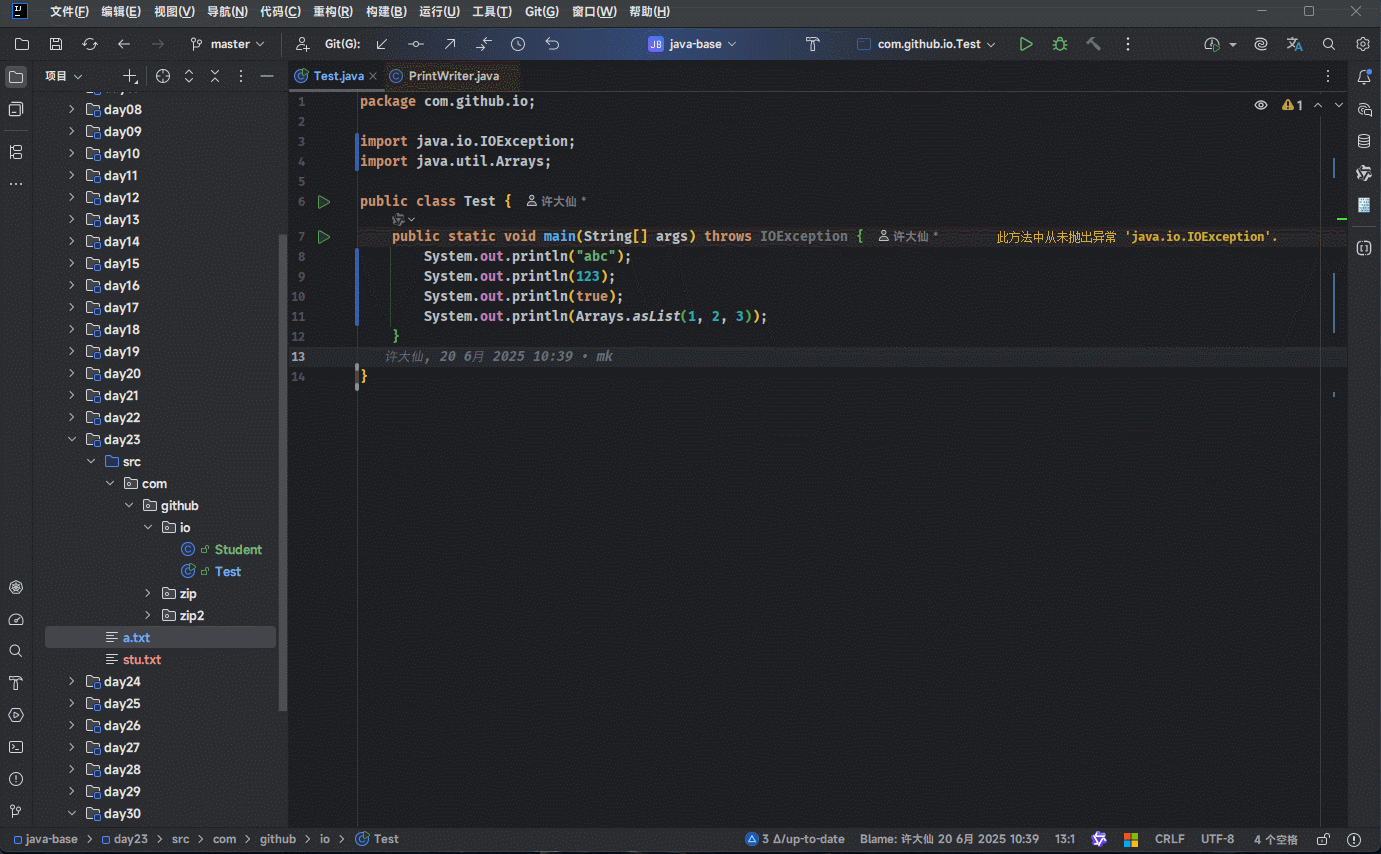
- 我们之前都是这样使用打印语句的,如下所示:
java
package com.github.io;

import java.io.IOException;
import java.util.Arrays;

public class Test {
    public static void main(String[] args) throws IOException {
        System.out.println("abc");
        System.out.println(123);
        System.out.println(true);
        System.out.println(Arrays.asList(1, 2, 3));
    }

}
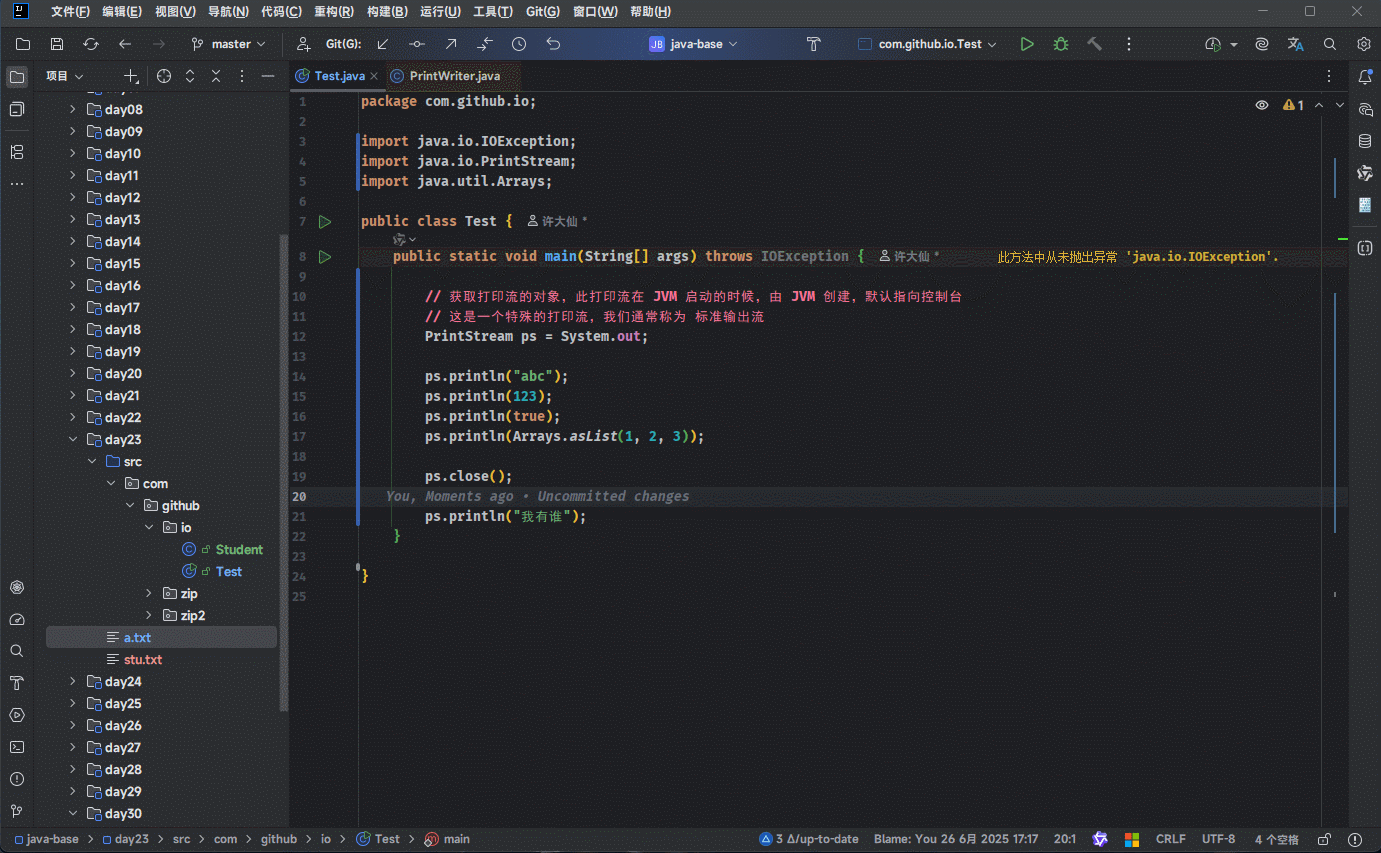
- 其实,之前我们采用的是链式编程,本来应该这样,如下所示:
java
package com.github.io;

import java.io.IOException;
import java.io.PrintStream;
import java.util.Arrays;

public class Test {
    public static void main(String[] args) throws IOException {

        // 获取打印流的对象,此打印流在 JVM 启动的时候,由 JVM 创建,默认指向控制台
        // 这是一个特殊的打印流,我们通常称为 标准输出流
        PrintStream ps = System.out;

        // 写出数据,自动换行,自动刷新
        ps.println("abc");
        ps.println(123);
        ps.println(true);
        ps.println(Arrays.asList(1, 2, 3));
    }
}- 需要注意的是,这个流是不需要关闭的;如果关闭了,就不能再写出数据了。
java
package com.github.io;

import java.io.IOException;
import java.io.PrintStream;
import java.util.Arrays;

public class Test {
    public static void main(String[] args) throws IOException {

        // 获取打印流的对象,此打印流在 JVM 启动的时候,由 JVM 创建,默认指向控制台
        // 这是一个特殊的打印流,我们通常称为 标准输出流
        PrintStream ps = System.out;

        ps.println("abc");
        ps.println(123);
        ps.println(true);
        ps.println(Arrays.asList(1, 2, 3));

        ps.close();

        ps.println("我有谁");
    }

}
第六章:压缩流和解压缩流(⭐)
6.1 概述
- 在现实生活中,如果在网络中我们要传输的数据太大,此时我们就可以先压缩再传输。

- 同理,如果我们接收到一个压缩包,还需要解压(解压缩)才能使用。

6.2 IO 体系
解压缩流主要是读取压缩包中的内容,所以它属于读,即:输入流。压缩流主要是将文件中的数据写到压缩包中,属于它属于写,即:输出流。
6.3 概念区别
- 我们平常所说的
文件压缩是这样的:右键一个文件 --> 添加到zip压缩文件 --> 生成.zip文件。

- 其实,在程序中的关注点可能有所不同,对于
文件压缩我们可以这么理解:

- 我们平常所说的
文件解压是这样的:右键一个zip压缩文件 --> 解压到指定目录 --> 得到新的文件夹。

- 其实,在程序中的关注点可能有所不同,对于
文件解压我们可以这么理解:

6.4 解压缩流
- 对于 Java 的解压缩流而言,压缩包中的每个文件或文件夹本质上都是 ZipEntry 对象:
txt
├─📦 test.zip --------------- # zip 压缩包
│  ├─📁 a-------------------- # ZipEntry 对象
│  │  ├─📄 a.txt------------- # ZipEntry 对象
│  │  ├─📄 aa.txt------------ # ZipEntry 对象
│  │  └─📄aaa.txt----------- # ZipEntry 对象
│  ├─📁 b-------------------- # ZipEntry 对象
│  │  ├─📄 b.txt------------- # ZipEntry 对象
│  │  └─📄 bbb.txt----------- # ZipEntry 对象
│  ├─📄 wallpaper_10642.webp # ZipEntry 对象
│  ├─📄 wallpaper_18158.webp # ZipEntry 对象
│ └─📄 wallpaper_18555.webp # ZipEntry 对象那么,解压的本质:
将每个 ZipEntry 对象,按照层级结构,拷贝到本地另一个文件夹中。示例:
java
package com.github.io;

import java.io.File;
import java.io.FileInputStream;
import java.io.FileOutputStream;
import java.io.IOException;
import java.util.zip.ZipEntry;
import java.util.zip.ZipInputStream;

public class Test {
    public static void main(String[] args) throws IOException {
        // 创建一个 File 对象表示压缩包
        File zip = new File("D:\\", "test.zip");
        // 创建一个 File 对象表示解压的目录
        File dir = new File("D:\\", "test");

        unzip(zip, dir);
    }

    /**
     * 解压的本质就是将压缩包中的每个文件或文件夹取出来,按照层次拷贝到目的地目录中
     *
     * @param zip 压缩包
     * @param dir 解压路径
     */
    public static void unzip(File zip, File dir) throws IOException {
        // 创建目的地目录,防止路径不存在
        dir.mkdirs();

        // 创建一个解压流用来读取压缩包中的内容
        ZipInputStream zis = new ZipInputStream(new FileInputStream(zip));

        // 获取压缩流中的每个压缩文件或文件夹,即:ZipEntry 对象
        ZipEntry zipEntry;

        while ((zipEntry = zis.getNextEntry()) != null) {
            // 判断是否是目录还是文件
            if (zipEntry.isDirectory()) {
                // 创建一个目录
                File subDir = new File(dir, zipEntry.getName());
                subDir.mkdirs();
            } else {
                // 复制文件到目的地目录中
                File subFile = new File(dir, zipEntry.getName());
                FileOutputStream fos = new FileOutputStream(subFile);
                byte[] buffer = new byte[1024];
                int len;
                while ((len = zis.read(buffer)) != -1) {
                    fos.write(buffer, 0, len);
                }
                fos.close();
                // 表示压缩包的文件处理完毕
            	zis.closeEntry();
            }

        }
        zis.close();
    }

}
6.5 压缩流
- 对于 Java 的压缩流而言,每个文件或文件夹本质上都应该是 ZipEntry 对象。
txt
├─📦 test.zip --------------- # zip 压缩包
│  ├─📁 a-------------------- # ZipEntry 对象
│  │  ├─📄 a.txt------------- # ZipEntry 对象
│  │  ├─📄 aa.txt------------ # ZipEntry 对象
│  │  └─📄aaa.txt----------- # ZipEntry 对象
│  ├─📁 b-------------------- # ZipEntry 对象
│  │  ├─📄 b.txt------------- # ZipEntry 对象
│  │  └─📄 bbb.txt----------- # ZipEntry 对象
│  ├─📄 wallpaper_10642.webp # ZipEntry 对象
│  ├─📄 wallpaper_18158.webp # ZipEntry 对象
│ └─📄 wallpaper_18555.webp # ZipEntry 对象那么,压缩的本质:将每一个文件或文件夹看成是 ZipEntry 对象,然后放入到压缩包中。
示例:压缩单个文件
java
package com.github.io;

import java.io.File;
import java.io.FileInputStream;
import java.io.FileOutputStream;
import java.io.IOException;
import java.util.zip.ZipEntry;
import java.util.zip.ZipOutputStream;

public class Test {
    public static void main(String[] args) throws IOException {
        // 创建一个 File 对象表示需要压缩的目录
        File src = new File("D:\\", "test\\a\\a.txt");
        // 创建一个 File 对象表示压缩文件的位置
        File zip = new File("D:\\");
        // 压缩单个文件
        toZip(src, zip);
    }

    /**
     * 压缩单个文件
     *
     * @param src 文件
     * @param zip 压缩包位置
     */
    public static void toZip(File src, File zip) throws IOException {
        // 创建一个压缩流表示压缩包
        ZipOutputStream zos = new ZipOutputStream(new FileOutputStream(new File(zip, "a.zip")));
        // 创建一个 ZipEntry 对象,表示压缩包中的一个文件
        // 如果 ZipEntry 中包含路径,就会一直创建多层目录,如:aaa\a.txt
        ZipEntry entry = new ZipEntry(src.getName());
        // 将文件写入压缩包
        zos.putNextEntry(entry);
        // 创建一个 FileInputStream 对象,用于读取文件
        FileInputStream fis = new FileInputStream(src);
        byte[] buf = new byte[1024];
        int len;
        while ((len = fis.read(buf)) != -1) {
            zos.write(buf, 0, len);
        }
        // 表示压缩包的文件处理问题
        zos.closeEntry();
        // 关闭流
        zos.close();
    }

}
- 示例:压缩目录
java
package com.github.io;

import java.io.File;
import java.io.FileInputStream;
import java.io.FileOutputStream;
import java.io.IOException;
import java.util.Objects;
import java.util.zip.ZipEntry;
import java.util.zip.ZipOutputStream;

public class Test {
    public static void main(String[] args) throws IOException {
        // 创建一个 File 对象表示需要压缩的目录
        File src = new File("D:\\", "test");
        // 创建一个 File 对象表示压缩文件的位置
        File zip = new File(src.getParentFile(), src.getName() + ".zip");
        System.out.println(zip);
        // 压缩目录
        toZip(src, zip);
    }

    /**
     * 压缩目录
     *
     * @param src 目录
     * @param zip 压缩包位置
     */
    public static void toZip(File src, File zip) throws IOException {
        ZipOutputStream zos = new ZipOutputStream(new FileOutputStream(zip));
        zipDirectory(src, zos, src.getName());
        zos.close();
    }

    /**
     * 作用:获取 src 里面的每一个文件,变成 ZipEntry 对象,放入到压缩包当中
     * 参数一:数据源
     * 参数二:压缩流
     * 参数三:压缩包内部的路径(文件的相对路径)
     */
    private static void zipDirectory(File src, ZipOutputStream zos, String name) throws IOException {
        File[] files = src.listFiles();
        for (File file : Objects.requireNonNullElse(files, new File[0])) {
            if (file.isFile()) {
                ZipEntry entry = new ZipEntry(name + File.separator + file.getName());
                zos.putNextEntry(entry);
                FileInputStream fis = new FileInputStream(file);
                byte[] buffer = new byte[1024];
                int len;
                while ((len = fis.read(buffer)) != -1) {
                    zos.write(buffer, 0, len);
                }
                fis.close();
                zos.closeEntry();
            } else {
                zipDirectory(file, zos, name + File.separator + file.getName());
            }
        }
    }

}
第七章:常用工具包(Apache Commons)
7.1 概述
- Commons 是 Apache 开源基金组织提供的工具包,里面有帮助我们提高开发效率的 API 。
- 目前,比较流行的 Commons 工具包,如下所示:
| 工具类名称 | 功能简介 | 所属 Apache Commons 库 |
|---|---|---|
| StringUtils | 字符串处理工具类 | commons-lang3 |
| NumberUtils | 数字处理工具类 | commons-lang3 |
| ArrayUtils | 数组处理工具类 | commons-lang3 |
| RandomUtils | 随机数生成工具类 | commons-lang3 |
| DateUtils | 日期处理工具类 | commons-lang3 |
| StopWatch | 计时器工具类,用于性能测试 | commons-lang3 |
| ClassUtils | 类与反射相关操作工具类 | commons-lang3 |
| SystemUtils | 系统属性与环境变量工具类 | commons-lang3 |
| MapUtils | Map 集合操作工具类 | commons-collections4 |
| BeanUtils | JavaBean 属性操作工具类 | commons-beanutils |
| IOUtils / FileUtils | 文件、流、I/O 处理工具类 | commons-io |
7.2 Commons-io
7.2.1 概述
- Commons-io 是 Apache 开源基金组织提供的一组有关 IO 操作的开源工具包。
- 如果我们使用 Maven 或 Gradle ,可以复制对应的坐标到项目中:
xml
<dependency>
    <groupId>commons-io</groupId>
    <artifactId>commons-io</artifactId>
    <version>2.19.0</version>
</dependency>groovy
implementation 'commons-io:commons-io:2.19.0'7.2.2 文件(文件夹)常用方法
- 文件(文件夹)常用方法:
| FileUtils 类(文件/文件夹相关) | 描述 |
|---|---|
public static void copyFile(File srcFile, File destFile){} | 复制文件 |
public static void copyDirectory(File srcDir, File destDir) {} | 复制文件夹 |
public static void copyDirectoryToDirectory(File srcDir, File destDir) {} | 复制文件夹 |
public static void deleteDirectory(File directory) {} | 删除文件夹 |
public static void cleanDirectory(File directory) {} | 清空文件夹 |
public static String readFileTostring(File file, Charset encoding){} | 读取文件中的数据变为字符串 |
public static void write(File file, CharSequence data, String encoding) {} | 写出数据 |
- 示例:
java
package com.github.io;
import org.apache.commons.io.FileUtils;
import java.io.File;
import java.io.IOException;
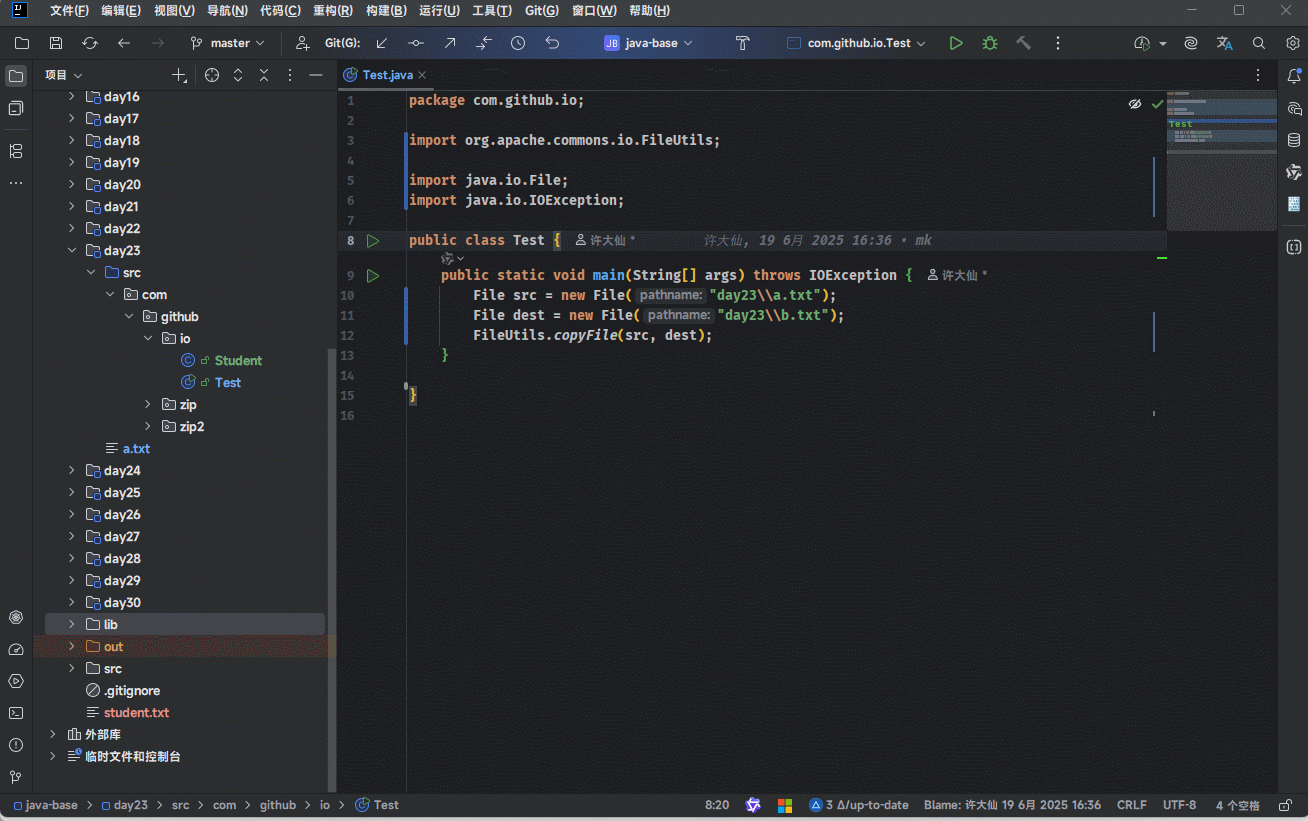
public class Test {
public static void main(String[] args) throws IOException {
File src = new File("day23\\a.txt");
File dest = new File("day23\\b.txt");
FileUtils.copyFile(src, dest);
}
}
- 示例:
java
package com.github.io;
import org.apache.commons.io.FileUtils;
import java.io.File;
import java.io.IOException;
import java.nio.charset.StandardCharsets;
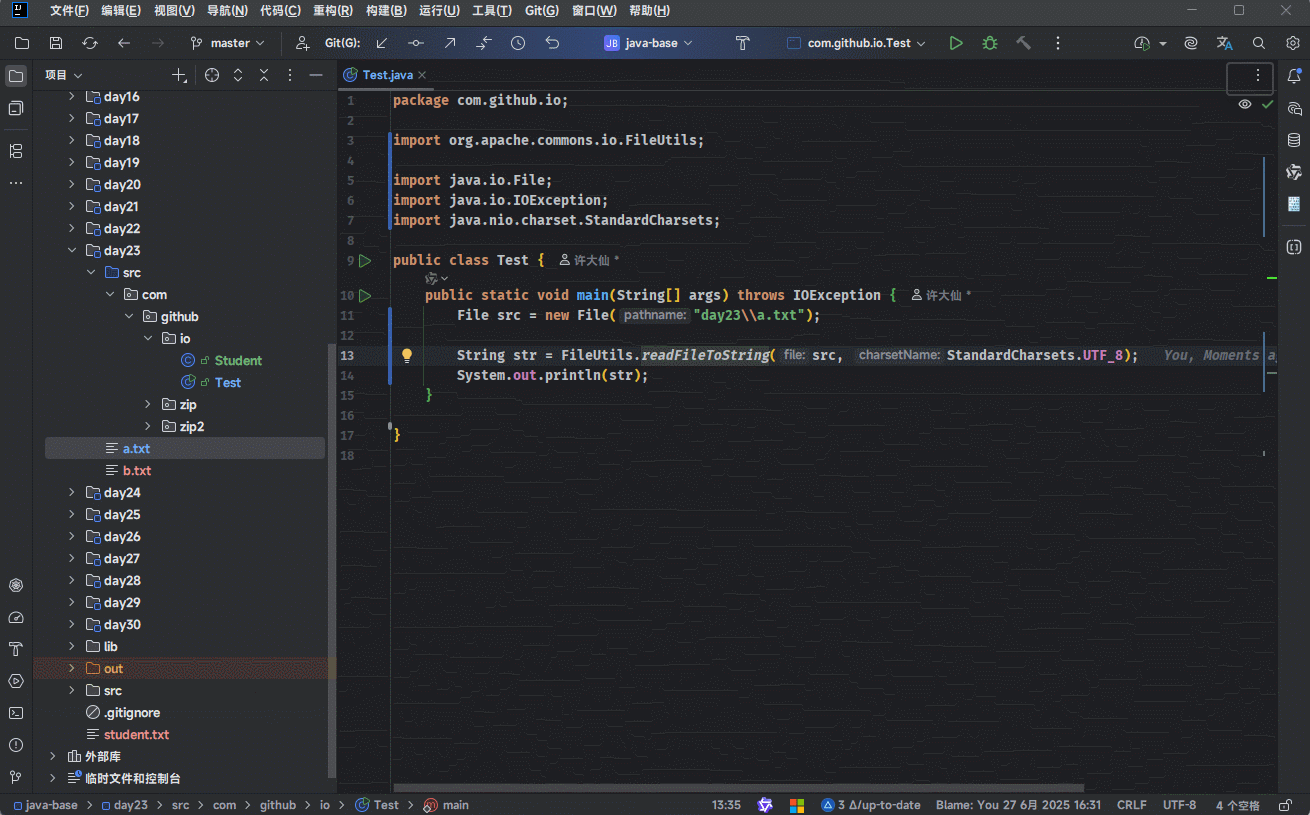
public class Test {
public static void main(String[] args) throws IOException {
File src = new File("day23\\a.txt");
String str = FileUtils.readFileToString(src, StandardCharsets.UTF_8);
System.out.println(str);
}
}
7.2.3 流相关常用方法
- 流相关常用方法:
| IoUtils类(流相关) | 描述 |
|---|---|
public static int copy(InputStream input, OutputStream output){} | 复制文件 |
public static int copylarge(Reader input, Writer output){} | 复制大文件 |
public static String readlines(Reader input){} | 读取数据 |
public static void write(String data, OutputStream output){} | 写出数据 |
- 示例:
java
package com.github.io;


import org.apache.commons.io.IOUtils;

import java.io.File;
import java.io.FileInputStream;
import java.io.FileOutputStream;
import java.io.IOException;

public class Test {
    public static void main(String[] args) throws IOException {
        File src = new File("day23\\a.txt");
        File dest = new File("day23\\b.txt");

        IOUtils.copy(new FileInputStream(src), new FileOutputStream(dest));
    }

}